Explore ClickUp API capabilities with this in-depth guide covering authentication, task management, webhooks, integrations, and more. Learn to automate workflows and integrate external tools with ClickUp
Introduction
Are you tired of manual data entry and repetitive tasks eating up your precious time? Say hello to the ClickUp API – your secret weapon for supercharging productivity and streamlining workflows. In this guide, we’ll dive into what the ClickUp API is, how it works, and why it’s a game-changer for businesses of all sizes.
Ready to harness the full potential of the ClickUp API? Let DTech Systems guide you through the process, from initial setup to advanced integrations. Contact us today to learn how we can supercharge your productivity with ClickUp and its powerful API.
What is the ClickUp API?
The ClickUp API is a powerful tool that allows developers to interact with ClickUp’s task management platform programmatically. It’s like having a direct line to ClickUp’s brain, letting you create, update, and manage tasks, projects, and more – all without lifting a finger (well, maybe just a few to write some code).
“The ClickUp API is the key to unlocking true automation in your task management workflow.”
Here’s what you can do with the ClickUp API:
- Create and update tasks automatically
- Manage custom fields and task dependencies
- Track time and generate reports
- Set up webhooks for real-time updates
- Integrate ClickUp with your favourite tools
Why Use the ClickUp API?
Now, you might be wondering, “Why should I bother with an API?” Great question! Here are some compelling reasons:
- Workflow Automation: Say goodbye to manual data entry. The ClickUp API lets you automate repetitive tasks, saving you hours of work each week.
- Seamless Integrations: Connect ClickUp with your other essential tools, creating a unified ecosystem for your business operations.
- Custom Reporting: Generate tailored reports and dashboards that give you deeper insights into your team’s performance.
- Real-time Updates: Stay on top of changes with webhooks, ensuring your team is always in sync.
- Scalability: As your business grows, the API allows you to scale your task management processes effortlessly.
Pro Tip: With the ClickUp API, you can create custom integrations that perfectly fit your unique business needs.
Getting Started with the ClickUp API
Ready to dive in? Here’s a quick overview of what you’ll need:
- API Authentication: Secure your connection with API tokens.
- Explore Endpoints: Familiarize yourself with available API endpoints for tasks, lists, spaces, and more.
- Handle Rate Limits: Be mindful of API usage limits to ensure smooth operations.
- Postman Collection: Use ClickUp’s Postman collection for easy API testing and exploration.
Authentication and API Access
Getting Started: API Authentication
ClickUp’s API uses two primary methods for authentication: Personal API Tokens and OAuth 2.0.
Personal API Tokens
- Navigate to ‘Settings’ > ‘Apps’ in your ClickUp account.
- Under “API Tokens”, click “Create new token”.
- Copy the generated token. This will be used in the Authorization header of your API requests.
Example API request using a personal token:
OAuth 2.0 Authentication Flow
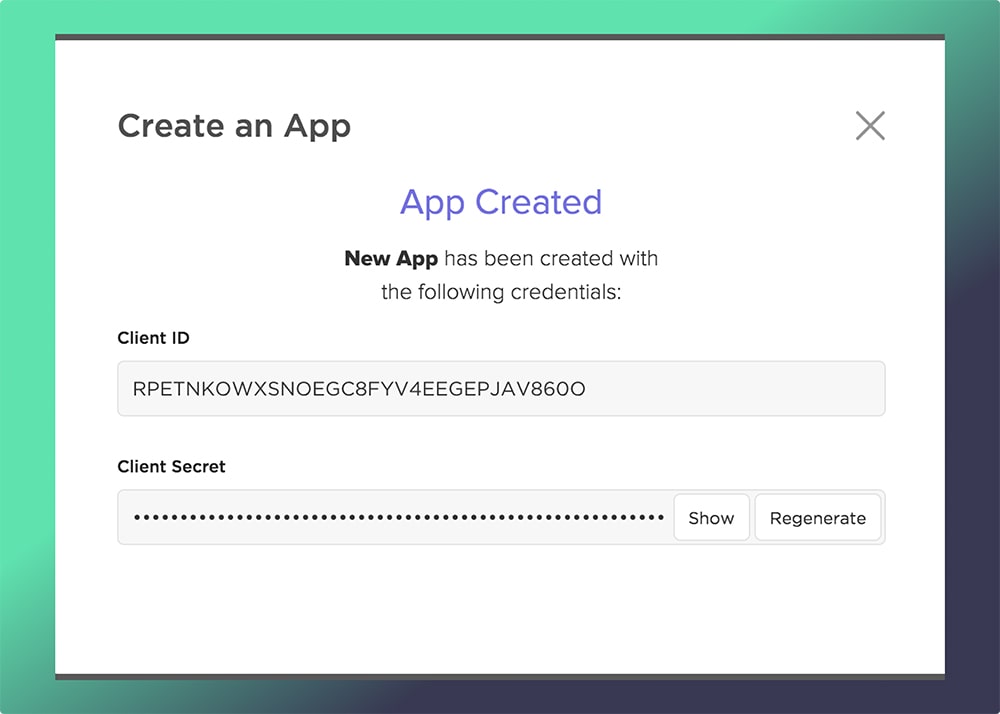
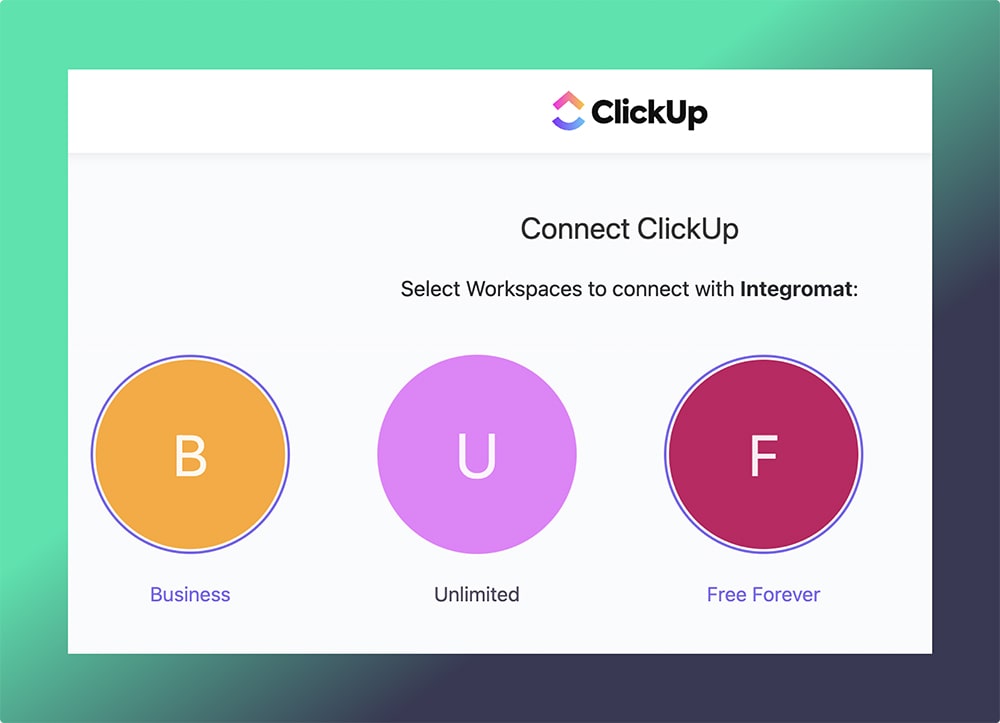
- Register your application in the ClickUp API dashboard to obtain a Client ID and Client Secret.
- Implement the OAuth 2.0 authorization code flow: a. Direct users to ClickUp’s authorization URL:
Copy
https://app.clickup.com/api?client_id=YOUR_CLIENT_ID&redirect_uri=YOUR_REDIRECT_URI&response_type=code
- b. After user authorization, ClickUp redirects to your specified URI with an authorization code. Exchange the code for an access token:
bash
Copy
curl -X POST https://api.clickup.com/api/v2/oauth/token \     -d "client_id=YOUR_CLIENT_ID" \     -d "client_secret=YOUR_CLIENT_SECRET" \     -d "code=AUTHORIZATION_CODE" \     -d "grant_type=authorization_code"
- d. The response will include an access token and refresh token.
Setting Up OAuth 2.0 for Multi-User Applications
- In the ClickUp API dashboard, create a new OAuth application.
- Set your redirect URI. This must match exactly in your authorization requests.
- Obtain your Client ID and Client Secret.
- Implement the OAuth 2.0 flow as described above.
- Use the obtained access token in the Authorization header of API requests:
bash
Copy
curl -H "Authorization: Bearer ACCESS_TOKEN" \     -H "Content-Type: application/json" \https://api.clickup.com/api/v2/team
6. Implement token refresh logic using the refresh token when access tokens expire:
bash
Copy
curl -X POST https://api.clickup.com/api/v2/oauth/token \     -d "client_id=YOUR_CLIENT_ID" \     -d "client_secret=YOUR_CLIENT_SECRET" \     -d "refresh_token=REFRESH_TOKEN" \     -d "grant_type=refresh_token"
Key considerations:
- Store Client Secret securely; never expose it client-side.
- Implement PKCE (Proof Key for Code Exchange) for added security in public clients.
- Use state parameters in authorization requests to prevent CSRF attacks.
- Securely store and manage user tokens, preferably encrypted at rest.
By properly implementing these authentication methods, you ensure secure access to ClickUp’s API endpoints while adhering to OAuth 2.0 best practices for multi-user applications.
Experimenting with the ClickUp API in Your Browser
Before diving deep into implementation, ClickUp offers a convenient way to test and familiarize yourself with the API directly in your web browser. This feature allows you to experiment with various endpoints without writing a single line of code.
How to Access the API Playground
- Visit the ClickUp API Reference documentation.
- Navigate to any endpoint page you’re interested in exploring.
- Look for the “Try It” button in the top right corner of the endpoint description.
Setting Up Your Test Environment
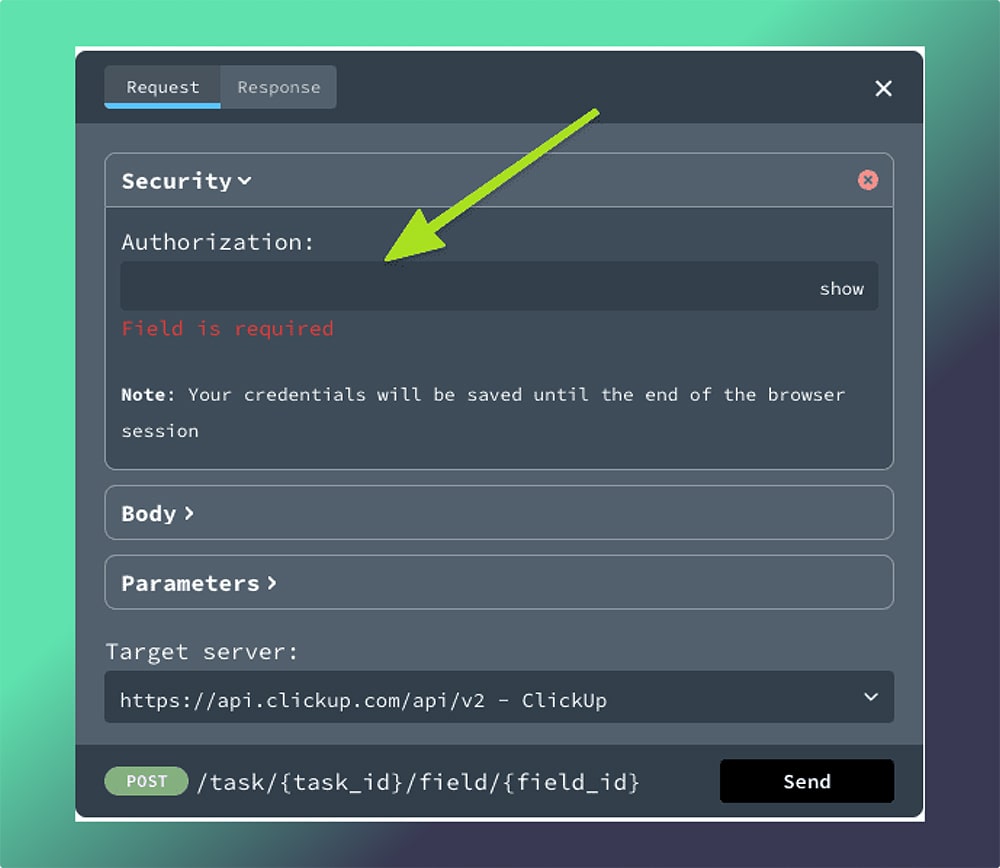
- API Key Configuration:
- Expand the “Security” section.
- Input your personal API key to interact with your actual ClickUp account data.
- For testing purposes, you can use any value as an API key when working with the mock server.
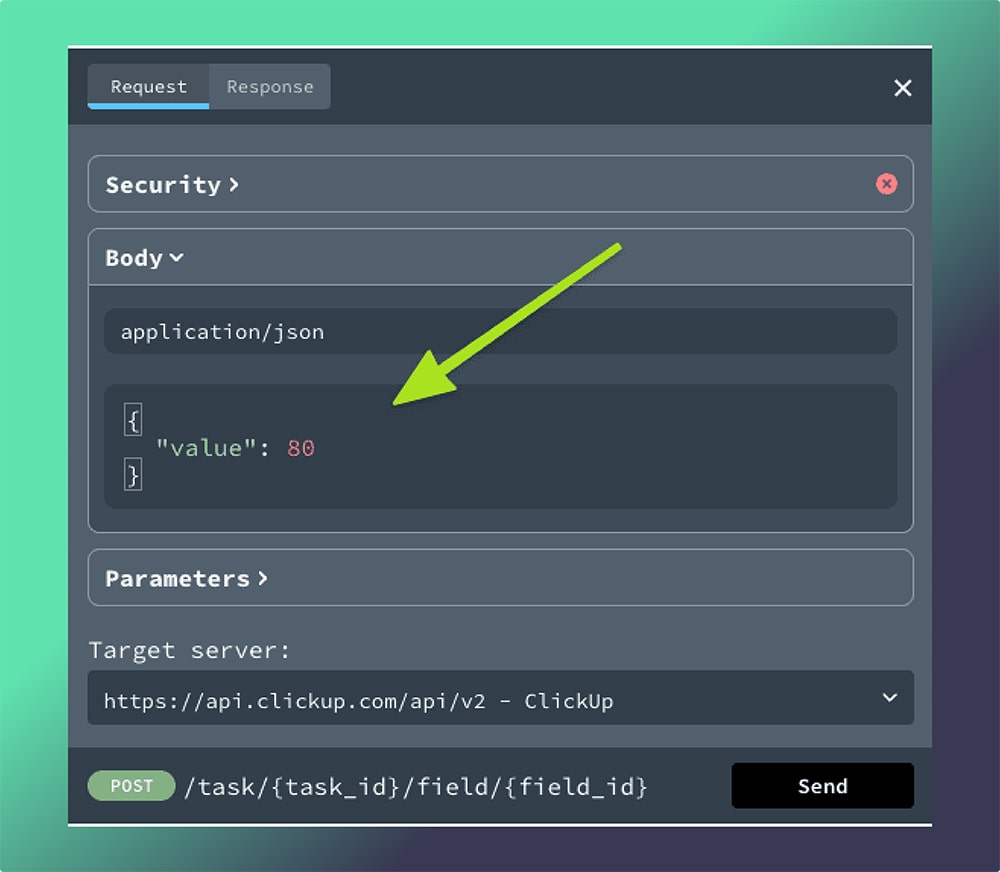
- Crafting Your Request:
- Use the “Body” section to include any necessary data in your request.
- Adjust parameters in the “Parameters” section to fine-tune your API call.
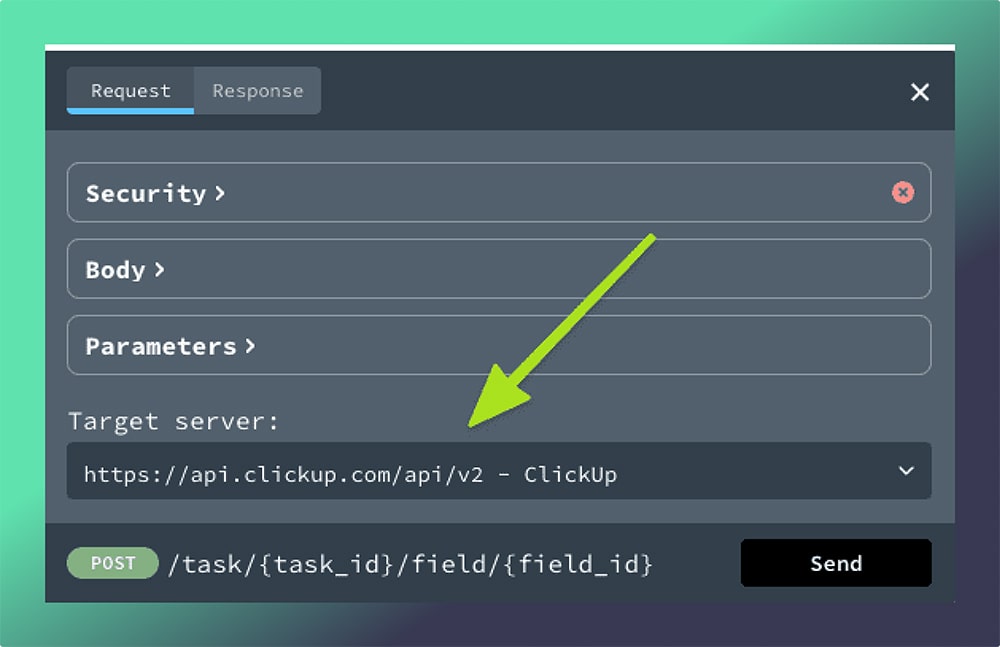
3. Choosing Your Server:
- Select between two server options: a)
https://api.clickup.com/v2for live ClickUp data b)https://{mock-server-id}.remockly.comfor simulated responses

Important Notes:
- Your ClickUp data remains secure during these tests. The website doesn’t store any information beyond your current browsing session.
- When using the mock server, feel free to input any values in required or optional fields. It’s designed to accept all inputs for testing purposes.
This browser-based testing feature is an excellent way to get hands-on experience with the ClickUp API. It allows you to understand the structure of requests and responses, experiment with different parameters, and see immediate results – all without the need for additional development tools.
Key ClickUp API Features
This section covers the essential features of the ClickUp API, focusing on task management, custom fields, and task dependencies. We’ll explain these features without diving into specific code examples.
Managing Tasks with the API
The ClickUp API provides comprehensive tools for handling tasks programmatically. This includes creating, reading, updating, and deleting tasks (often referred to as CRUD operations).
- Creating Tasks: You can add new tasks to any list in your ClickUp workspace. When creating a task, you can specify details like the task name, description, assignees, tags, status, priority, and due date.
- Reading Tasks: The API allows you to retrieve task information. You can fetch details for a single task or get a list of tasks within a specific list or folder.
- Updating Tasks: Any aspect of a task can be modified through the API. This includes changing the task name, updating its status, reassigning it, or altering its due date.
- Deleting Tasks: Tasks can be removed entirely from your ClickUp workspace using the API.
These operations enable you to automate task management processes, sync tasks with external systems, or build custom interfaces for task manipulation.
Managing Custom Fields
Custom fields in ClickUp allow for additional task metadata. The API provides methods to interact with these fields programmatically.
- Retrieving Custom Fields: You can get a list of all custom fields associated with a particular list. This includes information about the field type, possible values, and current settings.
- Updating Custom Fields: The API allows you to change the values of custom fields for specific tasks. This is useful for updating task metadata based on external events or processes.
- Creating and Deleting Custom Fields: While not as common, the API also supports adding new custom fields to lists or removing existing ones.
By leveraging custom fields through the API, you can extend ClickUp’s data model to fit your specific needs and keep it synchronized with other systems.
Utilizing Task Dependencies
The ClickUp API provides functionality to manage relationships between tasks, including dependencies.
- Creating Dependencies: You can establish links between tasks, indicating that one task depends on another. This is useful for modelling complex workflows or project structures.
- Retrieving Dependencies: The API allows you to fetch information about a task’s dependencies. You can see which tasks it depends on and which tasks are dependent on it.
- Deleting Dependencies: If a dependency is no longer relevant, it can be removed through the API.
- Types of Dependencies: The API supports different types of dependencies, such as “blocking” (where one task must be completed before another can start) or “waiting on” relationships.
By using these API features for task dependencies, you can create sophisticated project management tools, automate workflow processes, or ensure task sequences are properly maintained across your systems.
These key features of the ClickUp API provide a robust foundation for building integrations, automations, and custom tools that extend and enhance ClickUp’s functionality to meet specific organizational needs.
Advanced API Capabilities
Webhooks for Real-Time Event Notifications
Webhooks in ClickUp allow you to receive real-time notifications when specific events occur in your workspace. This feature enables event-driven automation and keeps your external systems in sync with ClickUp.
Key aspects of ClickUp webhooks:
- Setup: You can create webhooks for various events like task creation, updates, or status changes. Each webhook is associated with a specific endpoint URL where ClickUp will send event data.
- Event Types: ClickUp supports a wide range of event types, including task-related events, list changes, and more. You can choose which events to subscribe to based on your needs.
- Payload: When an event occurs, ClickUp sends a POST request to your specified URL with a JSON payload containing event details.
- Security: Webhooks include a secret key for verification, ensuring that the incoming data is genuinely from ClickUp.
- Use Cases: Webhooks are ideal for triggering automated actions, updating external databases, or sending notifications to team communication tools.
Time Tracking and Reports via API
The ClickUp API provides robust capabilities for time tracking and generating reports, allowing you to automate and integrate these features into your workflow.
Key features:
- Time Entry Management: You can programmatically start, stop, and edit time entries for tasks. This is useful for integrating ClickUp with external time tracking tools or building custom time tracking interfaces.
- Retrieving Time Data: The API allows you to fetch time entries for specific tasks, users, or date ranges. This data can be used to generate custom reports or dashboards.
- Report Generation: While ClickUp doesn’t provide direct report generation through the API, you can use the time data to create custom reports tailored to your needs.
- Bulk Operations: The API supports bulk operations for time entries, allowing for efficient data management and updates.
- Automation Possibilities: With these API capabilities, you can automate time tracking processes, create custom billing systems, or integrate time data with project management tools.
Integrations with External Tools
Native Integrations Supported by ClickUp API
ClickUp offers a wide range of native integrations that can be enhanced or customized using the API. Some key integrations include:
- Slack: Synchronize ClickUp tasks with Slack channels, send notifications, or create tasks from Slack messages.
- Jira: Bi-directional sync between ClickUp and Jira, allowing teams to work in their preferred tool while maintaining data consistency.
- Google Drive: Attach Google Drive files to ClickUp tasks, create new Google Docs from ClickUp, or sync task details with Google Sheets.
- GitHub: Link ClickUp tasks to GitHub issues or pull requests, automate status updates based on code changes.
- Zapier: Create complex automation workflows involving ClickUp and hundreds of other apps.
The ClickUp API allows you to extend these native integrations, adding custom functionality or tailoring them to your specific workflow needs.
Custom Integrations Using ClickUp API
Building custom integrations with the ClickUp API allows you to create tailored solutions for your organization’s unique needs. Here’s a high-level guide on creating custom integrations:
- Define Requirements: Clearly outline what you want your integration to accomplish. Identify the data flow between ClickUp and your other systems.
- API Familiarization: Thoroughly review the ClickUp API documentation to understand available endpoints and data structures.
- Authentication: Implement the appropriate authentication method (OAuth 2.0 or Personal API Tokens) based on your integration’s needs.
- Data Synchronization: Develop routines to sync data between ClickUp and your external systems. This might involve periodic API calls or webhook-driven updates.
- Error Handling: Implement robust error handling to manage API rate limits, network issues, and data inconsistencies.
- User Interface: If needed, create a user interface for your integration, allowing users to configure settings or trigger actions.
- Testing: Thoroughly test your integration in a development environment before deploying to production.
- Deployment and Maintenance: Deploy your integration and establish a process for ongoing maintenance and updates.
Custom integrations can range from simple scripts that automate specific tasks to complex applications that deeply integrate ClickUp with your organization’s software ecosystem. The flexibility of the ClickUp API allows for a wide range of possibilities, enabling you to optimize your workflows and increase productivity.
Best Practices for Using the ClickUp API
API Rate Limits and Performance Optimization
Understanding and respecting API rate limits is crucial for maintaining stable and efficient integrations with ClickUp. Here are key points to consider:
- Rate Limits: ClickUp imposes limits on the number of API requests that can be made within a given time frame. These limits vary based on your account type and the specific endpoint being accessed.
- Monitoring Usage: Keep track of your API usage to ensure you’re staying within the allocated limits. ClickUp provides headers in API responses that indicate your current usage and remaining quota.
- Batch Operations: Whenever possible, use batch operations to reduce the number of API calls. For example, update multiple tasks in a single request instead of making separate calls for each task.
- Caching: Implement caching strategies to store frequently accessed data locally, reducing the need for repeated API calls.
- Asynchronous Processing: For non-time-sensitive operations, consider implementing asynchronous processing to spread out API calls over time.
Security Considerations for API Access
Ensuring the security of your ClickUp API integration is paramount. Here are best practices for maintaining security:
- Secure Storage of Credentials: Store API tokens and OAuth credentials securely. Never expose these in client-side code or public repositories.
- Use OAuth 2.0: For multi-user applications, prefer OAuth 2.0 over personal API tokens. This allows for more granular access control and easier token management.
- Implement HTTPS: Always use HTTPS for all API communications to encrypt data in transit.
- Principle of Least Privilege: Only request the minimum necessary permissions for your application to function.
- Regular Audits: Periodically review and rotate API keys and tokens. Implement a process for revoking access when no longer needed.
Conclusion
The ClickUp API is a powerful tool that unlocks a world of possibilities for businesses and developers alike. By providing programmatic access to ClickUp’s robust task management features, it enables unprecedented levels of customization, automation, and integration.
As businesses continue to evolve in an increasingly digital landscape, tools like the ClickUp API become essential for staying competitive. By embracing its capabilities, organizations can create a more agile, responsive, and effective project management ecosystem, ultimately driving better outcomes and success in their endeavours.

