Managing client relationships effectively is a cornerstone of business success. However, juggling communication, project updates, and deliverables can be daunting without the right tools. Enter ClickUp, a versatile platform that simplifies and enhances client management with features tailored to modern business needs.
In this article, we’ll explore how ClickUp can improve client management processes, boost efficiency, and foster stronger client relationships.
What Is Client Management?
Client management is the process of overseeing and nurturing relationships with your clients to ensure mutual success. From onboarding to project delivery, it involves tracking communication, meeting deadlines, and managing expectations. Whether you’re a freelancer, a small business owner, or part of a large organization, effective client management is crucial to maintaining trust, delivering exceptional service, and fostering long-term partnerships.
The good news? Tools like ClickUp are designed to simplify and enhance the way you manage client relationships. In this article, we’ll explore how ClickUp can transform your client management processes and help you achieve outstanding results.
Why Is Client Management Important?
Client management isn’t just about keeping your clients happy—it’s about building relationships that last. When done right, it can:
Boost client satisfaction: Deliver projects on time and meet expectations.
Foster loyalty: Satisfied clients are more likely to return for future projects.
Encourage referrals: Happy clients often recommend your services to others.
Improve efficiency: Streamlined processes save time and resources for your team.
However, managing multiple clients, projects, and communication channels can quickly become overwhelming. That’s where ClickUp comes in.
How ClickUp Can Improve Client Management
ClickUp is more than just a project management tool—it’s a powerful platform that helps businesses organize, automate, and personalize client workflows. Here’s how ClickUp can revolutionize the way you manage your clients.
1. Centralized Client Information for Better Organization
ClickUp serves as a single source of truth for all client-related data. Its robust CRM templates allow businesses to:
Store client contact details, contracts, and project records.
Track communication history for seamless handoffs.
Monitor progress in real-time across multiple projects.
Having a centralized repository eliminates confusion and ensures your team always has up-to-date client insights, enabling faster and more personalized responses.
2. Streamlined Client Onboarding
First impressions matter, and onboarding is your first opportunity to showcase professionalism. With ClickUp, businesses can create repeatable onboarding workflowsby automating key steps:
Client intake forms to gather essential information.
Pre-built templates for contracts and agreements.
Checklists for internal teams to standardize setup processes.
This not only saves time but ensures no details fall through the cracks, setting a solid foundation for a successful partnership.
3. Clear Communication Channels
Client communication often gets bogged down in long email threads or lost messages. ClickUp offers several tools to ensure clarity, such as:
Task Comments: Keep project-specific discussions in context.
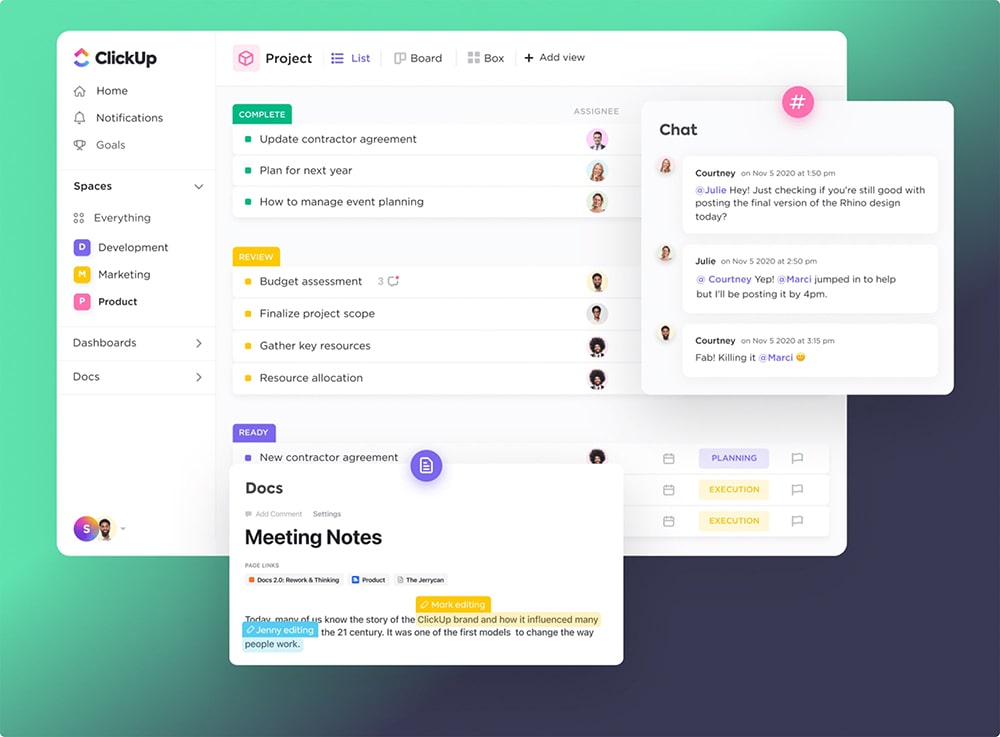
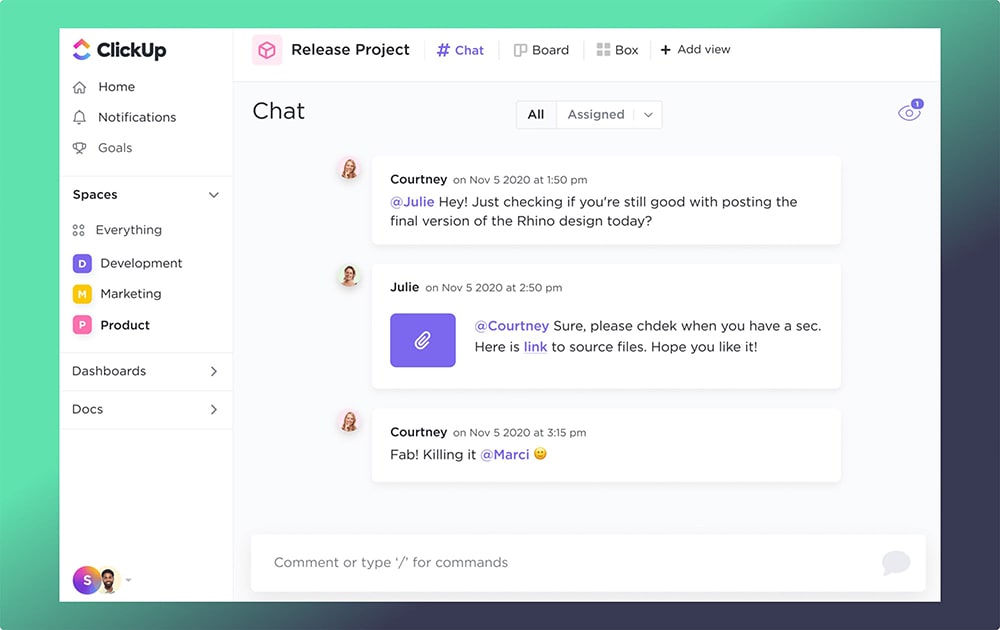
Real-Time Chat: Collaborate instantly with clients and team members.
Shared Docs: Create, edit, and share documents without switching platforms.
Improved communication minimizes misunderstandings and fosters a collaborative environment, especially when teams work remotely or across time zones.
4. Efficient Task and Deadline Management
Missed deadlines or unclear task ownership can hurt client trust. ClickUp empowers teams with tools to stay on track:
Assign tasks to specific team members with deadlines and priorities.
Break down large deliverables into manageable subtasks.
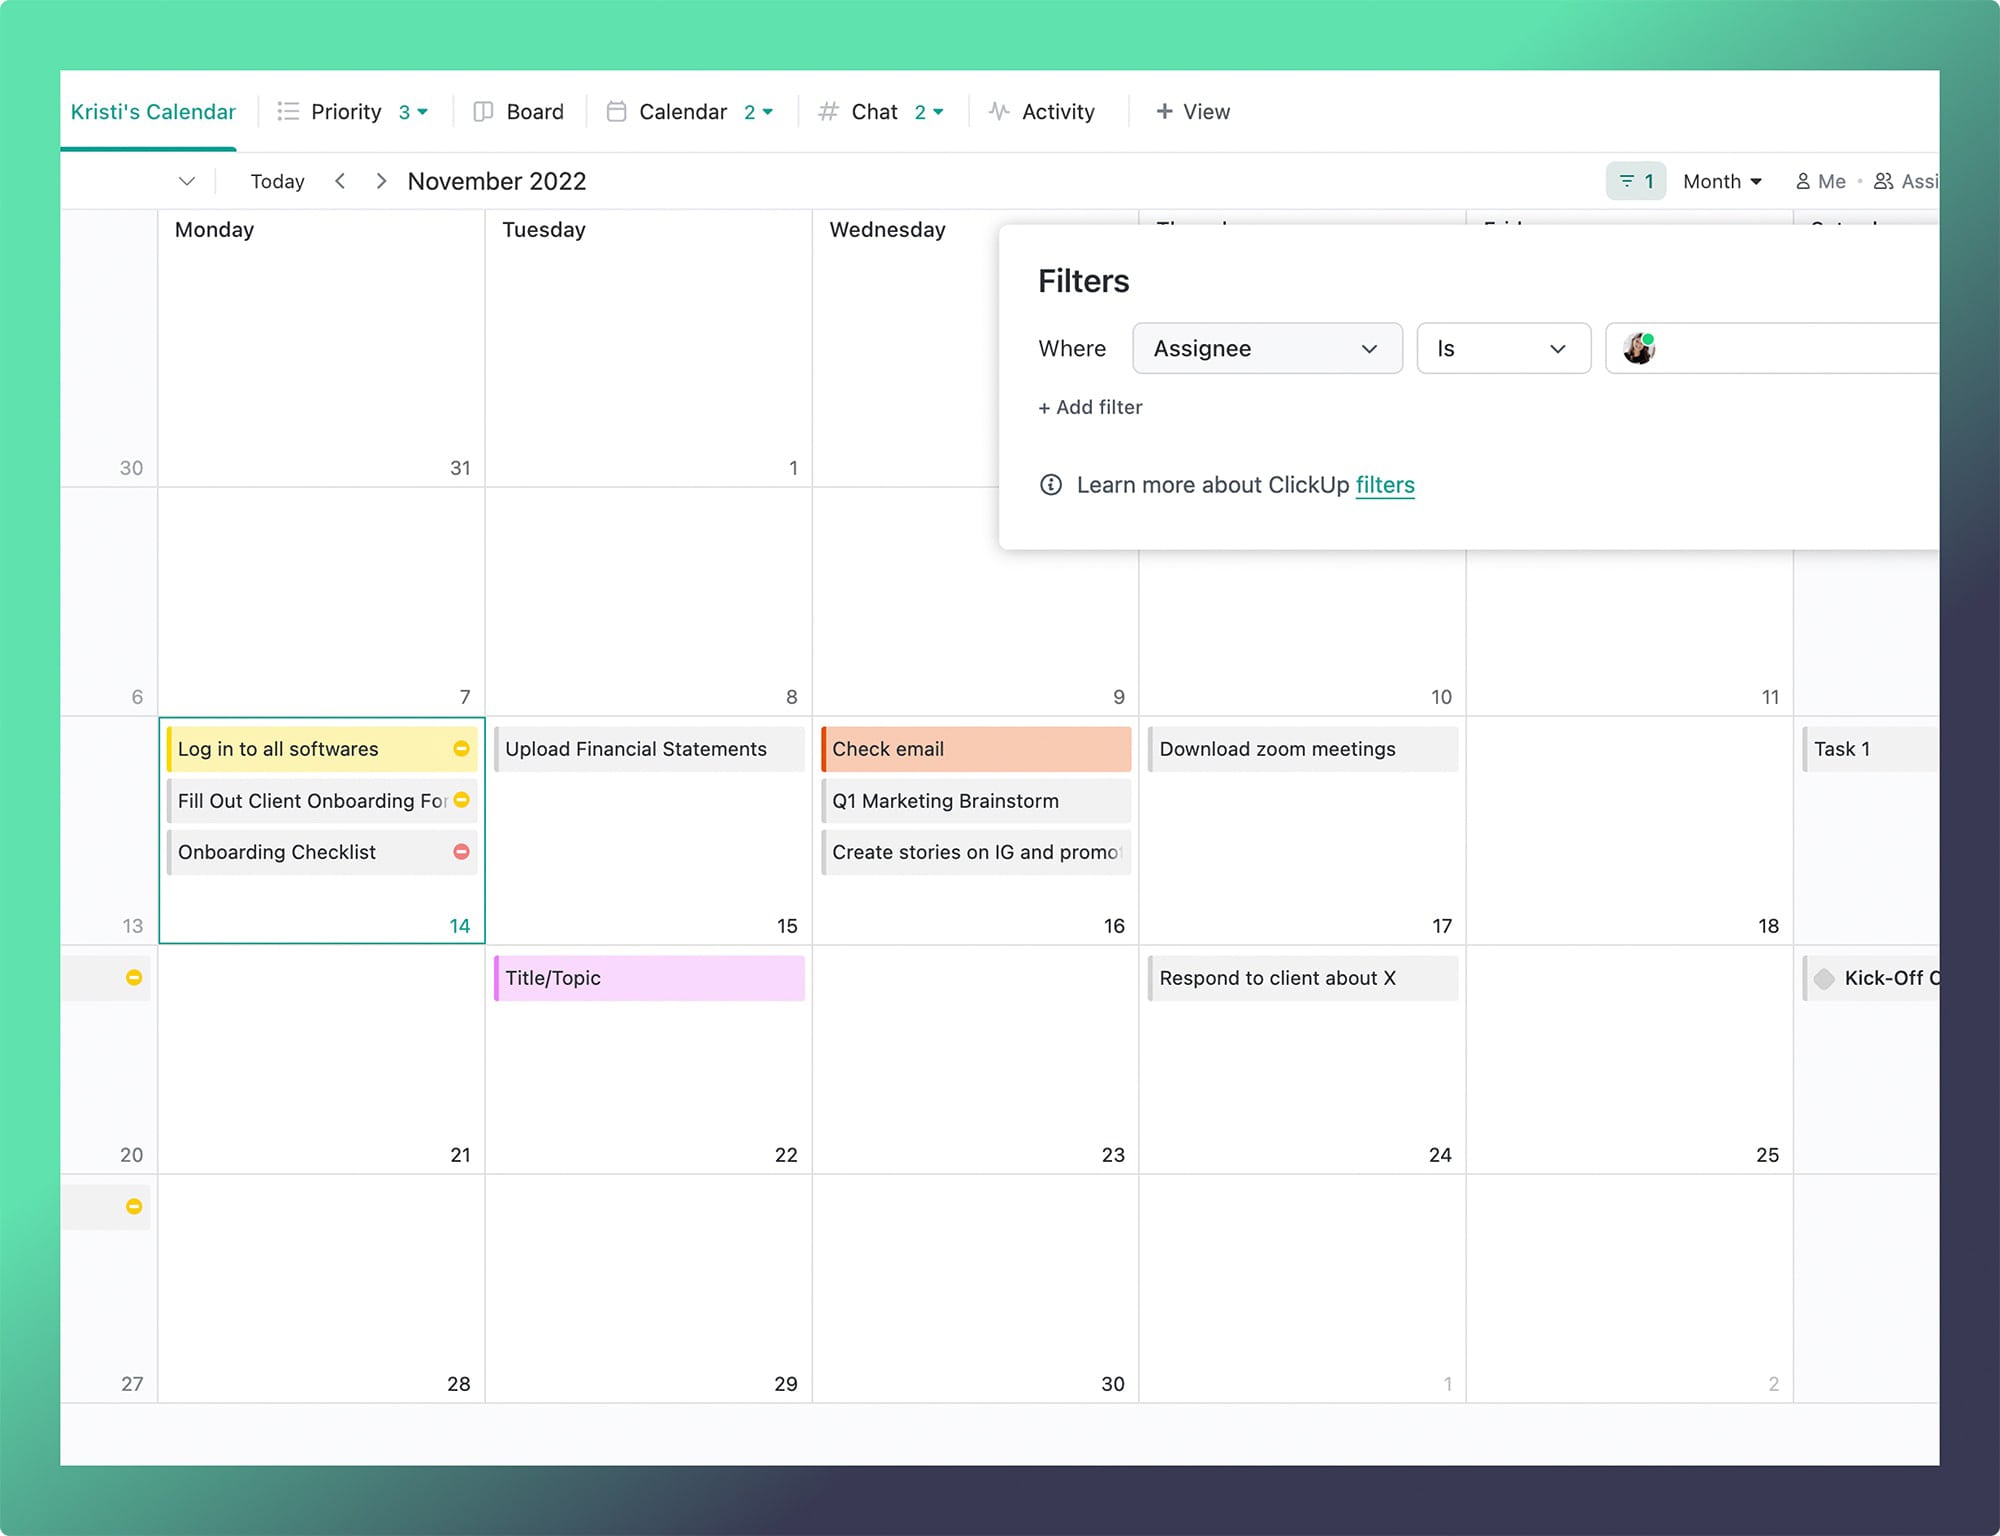
Use views like Kanban Boards, Gantt Charts, or Calendars to suit your workflow.
These features ensure accountability and make it easy to communicate project timelines to clients.
5. Automate Repetitive Client Management Tasks
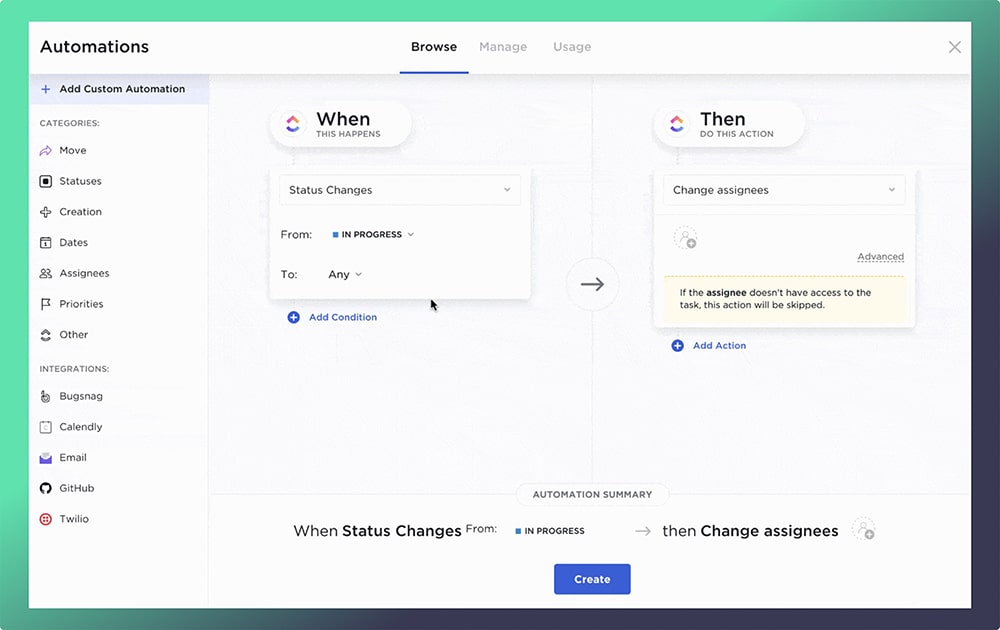
Repetition leads to inefficiency. ClickUp’s automation tools let businesses save hours by:
Automating client follow-ups based on task completion.
Sending reminders for overdue payments or project updates.
Updating task statuses automatically when conditions are met.
Automation frees up time for your team to focus on high-impact activities, improving overall productivity.
6. Transparent Progress Updates
Transparency builds trust. With ClickUp’s dashboards and reporting tools, you can keep clients informed without manual updates:
Custom Dashboards: Share project metrics and real-time progress updates with clients.
Milestone Tracking: Mark significant achievements to showcase project success.
Progress Charts: Visualize how tasks are advancing toward deadlines.
When clients can see progress in real-time, it reduces the need for frequent status meetings and reassures them about your reliability.
7. Personalize the Client Experience
Clients appreciate services tailored to their unique needs. ClickUp allows businesses to add custom fields and tags to client projects, capturing preferences such as:
Specific deliverables or goals.
Preferred communication channels or schedules.
Feedback from past interactions.
With this information, your team can provide a more personalized experience that exceeds client expectations.
8. Foster Proactive Client Engagement
Regular communication with clients, even outside of project updates, demonstrates commitment. ClickUp helps schedule and automate touchpoints such as:
Weekly or monthly check-ins.
Feedback requests on recent deliverables.
Updates on how their goals align with project performance.
By staying engaged, businesses can resolve issues before they escalate and uncover opportunities for additional collaboration.
9. Data-Driven Insights for Smarter Decisions
ClickUp’s reporting and analytics capabilities help you make informed decisions that improve client outcomes:
Identify bottlenecks in your workflow with time tracking.
Use historical data to better estimate timelines for future projects.
Analyze resource utilization to balance workloads effectively.
Data-driven strategies help optimize processes and ensure high-quality service delivery.
10. Celebrating Client Milestones
Acknowledging client successes strengthens your relationship and showcases the value you bring. With ClickUp, you can:
Track and document milestones such as project launches or revenue growth.
Create visual reports highlighting the impact of your collaboration.
Share these achievements during client reviews or celebrations.
Celebrating milestones makes clients feel valued and reinforces your role in their success.
How ClickUp Outshines Traditional Client Management Tools
ClickUp combines the best features of multiple platforms into one, making it an all-in-one solution for businesses. Here’s why it’s better than traditional tools:
Customizable Workflows: Tailor your dashboards, task views, and templates to fit your unique processes.
Scalable for Growth: Whether managing a few clients or scaling to hundreds, ClickUp adapts to your needs.
Affordable Pricing: Its cost-effective plans cater to businesses of all sizes.
By using ClickUp, you can consolidate multiple tools into one, saving costs and improving efficiency.
Real-World Success Stories with ClickUp
Numerous businesses have leveraged ClickUp for seamless client management. For example:
Agencies use it to manage multiple client projects without missing deadlines.
Consultancies rely on its CRM capabilities to track deliverables and communication in one place.
Freelancers appreciate its simplicity for managing clients and workflows solo.
These examples show how businesses across industries can benefit from ClickUp.
Get Started with ClickUp Today
ClickUp’s flexibility, powerful features, and user-friendly design make it the ultimate tool for client management. Ready to take your client relationships to the next level?
ContactDtech Systems—the only verified ClickUp reseller in Saudi Arabia. Let us help you set up ClickUp for your business and streamline your workflows for success!
Running a successful marketing campaign can be tricky. There are so many tasks, deadlines, and people involved. You need a smart tool to keep everything organized. ClickUp is the perfect choice for marketing teams. It helps you plan, track, and finish campaigns in one place.
This guide will show you how to use ClickUp to make your campaigns easier and more successful.
What is ClickUp?
ClickUp is a project management tool that brings all your work together. Instead of switching between apps for tasks, chats, and planning, you can do it all in ClickUp. For marketing teams, it’s great because:
You can organize tasks clearly.
Everyone can see updates in real time.
It saves time by automating repetitive work.
How To Use ClickUp For Marketing Campaigns
1. Plan Campaigns with ClickUp
Good planning is the foundation of any campaign. ClickUp has tools to make this simple:
Use Ready-Made Templates
ClickUp offers marketing templates to help you start quickly. These templates guide you step-by-step, so you don’t miss anything important.
Set Clear Goals
Use ClickUp’s Goals feature to define what you want to achieve in your campaign. For example, you can set goals for sales, website visits, or social media followers.
Brainstorm Ideas
With ClickUp’s Docs and Whiteboards, your team can brainstorm ideas together. You can add notes, images, and links all in one place.
2. Organize Tasks for Your Team
Once the campaign is planned, you need to assign tasks to your team. ClickUp makes this easy:
Assign Tasks with Deadlines
You can break your campaign into smaller tasks and assign them to team members. Set deadlines and priorities to keep everyone on track.
Use Different Views
ClickUp offers different ways to see tasks:
List View: A simple checklist of tasks.
Board View: A visual Kanban board to track progress.
Calendar View: A timeline of deadlines.
Add Checklists to Tasks
For detailed tasks, you can add checklists. For example, if you’re creating a blog, the checklist might include writing, editing, and publishing.
3. Communicate and Collaborate
Good communication is key to a successful campaign. ClickUp keeps your team connected:
Built-In Chat
ClickUp has a chat feature for team discussions. You don’t have to switch to email or messaging apps to talk about work.
Proofing for Content
When creating designs, videos, or other content, your team can use ClickUp’s Proofing tool. Team members can leave comments directly on the content, making feedback fast and clear.
Tag Team Members
Need help with a task? Tag a team member in the comments section to get their attention quickly.
4. Automate Work to Save Time
ClickUp can automate repetitive tasks, giving your team more time to focus on creative work.
Automations for Tasks
For example, you can set up automation to:
Change a task’s status to “In Progress” when it’s assigned.
Notify team members when a deadline is near.
Move completed tasks to a “Done” folder automatically.
Recurring Tasks
If you run campaigns regularly, you can set recurring tasks in ClickUp. This is perfect for monthly reports or social media posts.
5. Track Progress with Dashboards
Monitoring progress is essential for staying on track. ClickUp’s Dashboards give you a clear picture of your campaign at any time.
Track Key Metrics
Customize your dashboard to show important metrics, like:
How many tasks are completed.
Which tasks are overdue.
Campaign budget and spending.
Real-Time Updates
Dashboards update in real time, so you always have the latest information.
6. Analyze Campaign Results
After a campaign ends, it’s time to see what worked and what didn’t. ClickUp helps you analyze results easily:
Generate Reports
ClickUp can create reports to show how tasks were completed, team performance, and campaign results.
Integrate with Other Tools
ClickUp works with tools like Google Analytics and HubSpot to pull data into your reports.
7. Use ClickUp AI for Marketing
ClickUp’s AI tools are a big help for marketing teams in 2025. They can save you time and improve your campaigns:
Write Content Faster
ClickUp AI can help create ideas for blogs, emails, and social media posts.
Automate Workflows
AI can suggest ways to improve your workflows and reduce manual work.
8. Streamline Campaign Content Creation
Content creation is at the heart of most marketing campaigns. ClickUp offers tools to keep your content strategy organized and efficient.
Use Docs for Content Planning
ClickUp’s Docs feature lets you outline your content ideas, draft articles, or create social media plans in one place. Docs are easy to share with your team, and everyone can collaborate in real-time.
Organize Your Content Calendar
ClickUp’s Calendar View is perfect for planning when and where content will be published. Use it to organize blog posts, social media updates, email campaigns, and ad schedules.
Tag Tasks for Easy Search
Use tags like “Blog,” “Social Media,” or “Ad Campaign” to organize tasks by content type. This helps your team find what they need quickly.
9. Foster a Culture of Continuous Improvement
Successful marketing teams don’t stop at completing tasks; they aim to improve with every campaign. ClickUp supports this growth mindset:
Feedback Collection
Use ClickUp forms to collect feedback from your team, clients, or customers. Analyze the data to improve processes and outcomes.
Regular Retrospectives
Set up recurring tasks for team retrospectives. Use these sessions to review what went well and what needs improvement.
Automate Improvements
Based on feedback, create automated workflows to address bottlenecks or recurring issues in your campaigns.
Best Practices for Using ClickUp
To get the most out of ClickUp for your marketing campaigns:
Train Your Team: Make sure everyone knows how to use ClickUp effectively.
Customize Workspaces: Adjust ClickUp settings to match your team’s needs.
Ask for Feedback: Regularly ask your team how ClickUp can work better for them.
Why Choose ClickUp for Marketing in 2025?
ClickUp is more than just a task manager. It’s a tool that helps marketing teams work smarter, faster, and better. With ClickUp, you can:
Plan campaigns from start to finish.
Keep your team connected.
Track progress in real time.
Learn from past campaigns to improve future ones.
Conclusion
Managing marketing campaigns doesn’t have to be stressful. With ClickUp, you can simplify your work and focus on what matters most—creating successful campaigns. Want to boost your marketing campaigns? Let Dtech Systems help you get started with ClickUp. Visit Dtech Systems to learn more and take your campaigns to the next level!
ClickUp has rolled out a variety of impactful features in 2024 aimed at enhancing project management, streamlining workflows, and boosting team productivity. With improvements in automations, task management, reporting, time tracking, and collaboration, users now have access to tools that offer both customization and efficiency. Here’s a more detailed breakdown of the features introduced each month in 2024:
January: Enhanced Task Automations and Template Management
ClickUp started the year by refining task management and streamlining automation tools to help teams enhance their workflows.
Automations Based on Task Type: Now, you can create customized workflows for different task types, such as bugs or features, to streamline task management. This ensures each task follows the most relevant process, saving time and effort across various projects.
Pin Up to 5 Task Templates: This feature lets you pin up to five task templates to a List for faster task creation. Predefined templates help maintain consistency and efficiency across tasks, especially when specific formats or steps need to be followed.
February: Formula Fields and Timesheet Tracking Unleashed
February was focused on optimizing task organization and enhancing time tracking features.
Unlock the Full Power of Formula Fields: ClickUp now allows users to sort, filter, and group tasks based on custom formulas. This feature adds flexibility for teams to manage data, making workflows more dynamic and adaptable to various needs.
Track Time with Timesheets: The new Timesheets feature provides an easy way to track and manage time, helping users stay on top of their hours. Admins can oversee capacity and billable hours across teams with a quick, organized overview.
March: Seamless Integration with Notion and GitHub
March introduced integrations and collaborative tools to enhance team coordination.
Move from Notion to ClickUp: Import your Notion docs and databases directly into ClickUp, including tasks and comments. This update saves time and reduces the hassle of switching between apps, making it easier to migrate and manage content in one place.
Enhanced GitHub Integration: With a redesigned GitHub integration, users can now manage pull requests and view GitHub activity directly within ClickUp. This streamlines workflows for development teams by bringing essential information into one platform.
April: Boost Time and Billing Management
April focused on making time tracking and task handling even more customizable.
Unlock Dashboards with Formula Fields: With the introduction of Formula Fields, users can now take calculations to the next level within Dashboards. This feature enables you to perform calculations, like determining total profit or generating an average composite score, directly on your Dashboard. It allows users to see essential project metrics at a glance, making it easier to track and assess performance.
Enable Default Billable Time Tracking: Time entries can now be automatically marked as billable by default. This feature adds flexibility to time management, allowing users to set up default billable settings on a per-Space basis. It helps streamline the process for teams working on client projects or other billable activities.
Receive Email Notifications for Invoices: Workspace owners and admins can now opt to receive email notifications whenever a new invoice is generated. These notifications are a valuable addition to ClickUp’s billing capabilities, providing an easy way to stay updated. You can customize invoice settings to include memos, track invoice history, and view specific invoices, improving overall billing visibility.
May: Streamlined Dashboards and AI Automation
May saw the launch of powerful tools to improve team productivity and task tracking.
Add Dashboards as a View: Dashboards can now be integrated directly into your workspace views. This allows teams to access critical project insights in real-time, using prebuilt templates for quick, comprehensive analysis of project performance and metrics.
Centralized Automation Activity: New activity logs centralize all automation data, showing the date, status, and actions for each automation. This makes it easier for users to monitor, adjust, and ensure their automations are running smoothly across the workspace.
Automate Your AI Custom Fields: Custom Fields can now be integrated with automation to generate AI-powered summaries and updates automatically. This feature helps save time and provides real-time insights into ongoing tasks and project progress.
Automatically Archive Past Sprints: Sprint Automations now automatically archive past sprints, preventing clutter in the Sprint Folder. This helps maintain an organized workspace by ensuring that only active sprints are visible without manual intervention.
June: Dynamic Automations and Sprint Management
June brought even more enhancements for collaboration, task assignment, and reporting.
Dynamic People Fields in Automations: Automatically assign tasks based on dynamic fields, such as who created the task or triggered the automation. This helps reduce the number of manual steps required and improves task distribution efficiency.
Use a Template for Sprints: Save Sprint templates and apply them to future Sprints. This feature streamlines project setup and reduces repetitive tasks by reusing settings, views, and automations.
July: Custom Icons and Enhanced Slack Integration
July’s updates introduced more tools for managing time, tasks, and team workflows.
Add Custom Icons to Lists: Make it easier to navigate your workspace by adding custom icons to Lists. This feature adds a personal touch while improving organization and visibility across tasks.
Preview Slack Links: ClickUp now previews Slack links when pasted into tasks, showing a card with the message preview. This allows users to quickly gather context from Slack messages without leaving the platform.
Voting Custom Fields: A new Voting Custom Field type allows teams to vote on tasks or ideas using customizable emojis. This feature can be used for decision-making, prioritization, and fun team activities like settling the age-old debate of whether dogs or cats are the better pet.
August: AI Improvements and Advanced Customization
August was all about AI-enhanced features for boosting team productivity and data handling.
A Smarter, Faster, and More Connected AI: The new ClickUp AI integration, powered by Connected Search, helps you find and summarize information from your connected apps such as Google Docs and GitHub. With a new floating action button and real-time project updates, AI now makes it easier to manage tasks and workflows directly from the platform.
Formula Custom Fields in Automations: You can now use Formula Custom Fields as Triggers and Conditions in Automations, giving you more power and flexibility to automate complex workflows and processes within ClickUp.
New Signature Custom Field Type: The Signature Custom Field enables you to digitally acknowledge receipt, confirm delivery, or take attendance. You can also integrate this feature into Forms and use it in Automations as triggers or conditions, streamlining your workflows.
Audit Logs: For Enterprise Workspaces, owners and admins can access detailed user authentication and task activity logs. With enhanced filtering by date, user, and event, this feature helps you monitor and review key activities and control access with custom permissions.
September: AI-Powered Collaboration and Advanced Customization
September’s updates introduced further improvements to task tracking and data visualization.
ClickUp Chat: ClickUp Chat combines chat functionality with AI-driven features, helping automate task creation, action item identification, and question answering, improving communication and efficiency within your team.
Formula Fields for Dashboard Bar Charts: Use Formula Fields in Bar Chart Dashboard cards for advanced visualizations, enabling you to track and analyze metrics more effectively with customized chart views.
Group by Custom Relationships: Easily group tasks by Custom Relationships in List view, streamlining project and client management, with plans for more relationship types and views in the future.
Default Value for Custom Fields: Set default values for Custom Fields to ensure consistency and reduce manual input when tasks are created, saving time across your workflow.
Templates Now Support Dashboard Views: Templates for Spaces, Folders, and Lists now include Dashboard views, ensuring a quicker setup and replication of workspace structures.
Nested Formulas: Nested Formulas allow you to create advanced calculations within formulas, enhancing workflow customization with built-in error handling and tooltips for easier management.
October: Custom Field Permissions and Enhanced Sprint Management
October focused on new customization features and reporting tools.
Private Custom Fields and Permissions: You now have more control over your custom fields by setting permissions for who can view or edit them. This ensures sensitive data is kept private and gives admins greater oversight.
Donut Charts: ClickUp users can now turn Pie Charts into visually appealing Donut Charts for better data representation. This feature allows teams to customize how they visualize project and task data.
Easily Add Tasks from Your Backlog to Sprints: Sprint management becomes easier with new cards that allow you to quickly add tasks from your backlog, check for missing estimates, and assign ownership—all from within the Sprint view.
November: Improved Automations and Chat Features
November ended the year with even more automation features and enhanced tracking capabilities.
Trigger Automations Before/After a Date: Build more efficient workflows by triggering Automations based on specific dates, such as sending reminders before due dates or initiating tasks on specific days relative to deadlines.
Audit Logs Now Support Custom Fields Activity: Track changes in Custom Fields through Audit Logs. View all edits, creations, deletions, and location updates made by Workspace users, making it easier to monitor and debug activity related to Custom Fields.
Chat Channels, SyncUps, and Launchpad: You can now create Chat Channels outside of Spaces, quickly start real-time audio or video calls with one-click SyncUps, and find new conversations more easily with an upgraded Launchpad. Additionally, more Workspaces are being moved off the waitlist for broader access.
Key Takeaways from 2024
ClickUp’s updates this year focused on:
Customization: Automations now customizable by task type and dynamic assignment in workflows.
Time Tracking: Timesheets for tracking time, with billable hours default.
Reporting: Use Formula Fields in Dashboards for metrics; bar and donut charts added.
Communication: AI-powered ClickUp Chat; Voting Custom Field for team decisions.
Project Management: Dashboards as views; advanced sorting and filtering for tasks.
Visualizations: More advanced visualizations with Formula Fields in charts.
These updates highlight flexibility, efficiency, and improved data visualization.
Conclusion
2024 has been an incredible year of innovation for ClickUp, with new features focused on task management, time tracking, automation, and collaboration. These features empower teams to work more efficiently, automate complex processes, and improve communication. ClickUp continues to be a robust platform for project management, offering solutions tailored to both small teams and large enterprises.
As the only verified ClickUp reseller in Saudi Arabia, Dtech Systems is your partner in unlocking ClickUp’s potential. Our team of experts will:
Implement features tailored to your business needs.
Train your team to maximize productivity.
Optimize your workflows for better results.
Ready to transform your workflows? Contact Dtech Systems today for expert guidance and seamless implementation of ClickUp’s 2024 innovations. Let’s boost your productivity together!
Discover how ClickUp is revolutionizing freelancing in 2024. Learn why it’s the ultimate tool for managing projects, collaborating with clients, and boosting productivity.
In today’s competitive freelancing landscape, staying organized, efficient, and productive is essential for success. Whether you’re managing multiple clients, juggling tight deadlines, or trying to keep your administrative tasks in check, having the right tool can make all the difference. This is where ClickUp shines.
ClickUp is more than just a project management tool; it’s an all-in-one platform designed to help freelancers streamline their workflows, collaborate with clients, and manage their business like a pro. With its intuitive interface, powerful features, and ready-to-use templates, ClickUp has become the go-to solution for freelancers who want to take their productivity to the next level.
In this article, we’ll explore why ClickUp is the ultimate tool for freelancers in 2024, how it simplifies the complexities of freelancing, and which templates can save you time and effort. Let’s dive in and discover why ClickUp should be an essential part of your freelance toolkit.
Why ClickUp is Essential for Freelancers
Freelancers often wear many hats, from project managers to marketers and financial planners. Without a streamlined system, it’s easy to lose track of important tasks or miss deadlines. ClickUp eliminates the chaos by offering a centralized platform for all your work.
Key Benefits of ClickUp for Freelancers:
Enhanced Organization: Keep all tasks, deadlines, and client communications in one place.
Improved Productivity: Customizable features and templates save time and reduce manual work.
Better Collaboration: Tools like guest access and shared views ensure seamless communication with clients.
Time Tracking and Reporting: Monitor your hours and generate detailed reports for billing.
Whether you’re managing a handful of clients or scaling your freelance business, ClickUp adapts to your needs.
Top Features That Make ClickUp Perfect for Freelancers
1. A Customizable Workspace
ClickUp’s hierarchy system is ideal for organizing your freelancing business. It allows you to create:
Workspaces: Overarching areas for all your projects.
Spaces and Folders: Separate sections for each client or project category.
Lists and Tasks: Detailed breakdowns of deliverables and to-dos.
This flexibility ensures you can structure your work in a way that makes sense for you.
2. Freelancer-Specific Templates
ClickUp offers a variety of freelancer templates designed to simplify your work. These include:
You can switch between views based on your needs, helping you stay on top of tasks.
5. Automation to Save Time
Freelancers often handle repetitive tasks like invoicing or updating project statuses. ClickUp’s automation tools can:
Create recurring tasks for regular deliverables.
Automatically move tasks to different stages in your workflow.
Send notifications for approaching deadlines.
By reducing manual work, automation frees up your time to focus on what matters most—your work.
6. Collaboration Tools for Client Management
ClickUp excels in client collaboration with features like:
Guest Access: Allow clients to view or comment on specific tasks.
Comments and Threads: Keep discussions organized within tasks.
Shared Views: Share public links for project progress updates.
These tools improve transparency, making it easier to build strong client relationships.
How ClickUp Simplifies Freelance Workflows
ClickUp consolidates all your tools into one platform, eliminating the need to switch between apps. Here’s how it makes freelancing easier:
1. Centralized Project Management
Track all tasks, deadlines, and client feedback in one place. With ClickUp, you’ll never lose track of a project again.
2. Streamlined Communication
Tools like comments, shared views, and guest access keep clients informed and engaged. Clear communication reduces misunderstandings and strengthens relationships.
3. Improved Efficiency
Time-saving features like templates, automation, and time tracking free you from administrative burdens, allowing you to focus on delivering high-quality work.
Success Stories: Freelancers Using ClickUp
Freelancers from diverse industries have embraced ClickUp for its versatility and efficiency. Success stories include:
Designers: Streamlined creative workflows with Kanban boards and project trackers.
Writers: Managed editorial calendars and tracked client approvals effortlessly.
Developers: Used Gantt charts to manage timelines for complex projects.
ClickUp adapts to your specific needs, making it the go-to platform for freelancers worldwide.
How to Get Started with ClickUp
Starting with ClickUp is simple:
Set Up Your Workspace: Create a Workspace tailored to your freelancing needs.
Organize Projects: Use Spaces and Folders to group work by clients or categories.
Leverage Templates: Save time with ClickUp’s ready-made templates for project tracking, invoicing, and more.
Invite Clients: Add clients as guests for transparent collaboration.
Track Your Time: Use the time tracker to log hours and generate billing reports.
Automate Repetitive Tasks: Set up automation rules to handle recurring tasks.
Why ClickUp is the Best Tool for Freelancers in 2024
ClickUp’s continuous updates and innovative features ensure it remains ahead of the curve. Here’s why freelancers love it:
Customizable: Tailor ClickUp to fit your workflow, no matter your industry.
Comprehensive: Manage everything from tasks to time tracking in one place.
Affordable: With free and budget-friendly plans, ClickUp suits freelancers at every stage.
Conclusion: Elevate Your Freelance Business with ClickUp
Freelancing doesn’t have to mean chaos. With ClickUp, you can organize your work, collaborate with clients, and streamline your processes—all in one platform. Its robust features, customizable templates, and automation tools make it the ultimate project management solution for freelancers in 2024.
Ready to supercharge your freelance business? Start using ClickUp today and experience the difference. For personalized guidance, contact Dtech Systems, the only verified ClickUp reseller in Saudi Arabia. Let us help you set up and optimize your ClickUp Workspace for maximum productivity!
Discover 10 hidden ClickUp features that can transform your workflow. From custom statuses to automation, these tools can help boost productivity and streamline projects.
Introduction
ClickUp is one of the top project management tools available, packed with features to keep teams organized and efficient. While many users know about the basic features like task lists, time tracking, and Gantt charts, ClickUp also has some hidden tools that can really boost productivity.
In this article, we’ll uncover 10 lesser-known ClickUp features that are easy to use and can make a huge difference in managing projects. Let’s dive into these hidden gems and see how they can help your team work smarter!
1. Automations – Let ClickUp Do the Work for You
Automations are essential for reducing manual, repetitive tasks. With ClickUp’s Automations, you can create rules that automatically trigger actions, making your workflow faster and more efficient.
Assign tasks based on triggers: Set up automation rules to assign tasks to specific team members automatically, depending on the task type, priority, or tags.
Send reminders for deadlines: Automatically notify team members about upcoming due dates to ensure nothing slips through the cracks.
Complex workflows: Automate different actions, such as updating statuses, moving tasks to different lists, or notifying specific team members when task statuses change.
Pro Tip: Automate routine processes to save time on repetitive tasks, allowing your team to focus on high-impact work.
2. Task Dependencies & Relationships – Keep Work on Track
Dependencies and Relationships in ClickUp help streamline task management by showing task connections and organizing task order.
Dependencies: Link tasks with the “Blocking” and “Waiting on” options, so team members know when a task cannot begin until another is completed.
Task Relationships: Connect related tasks across projects or departments to see dependencies and maintain alignment.
Avoid bottlenecks: With dependencies, teams can identify potential bottlenecks and prevent task delays by ensuring necessary steps are completed.
Pro Tip: Use Relationships to keep cross-departmental projects in sync, linking tasks that need each other’s updates or actions.
3. Custom Task Statuses – Build Workflows That Fit Your Team
ClickUp lets you create custom statuses for each stage of your project, making task tracking more specific to your workflow needs.
Tailored workflows: Create status lists that match each department’s workflow, like “Reviewing” and “Published” for marketing or “Testing” and “Released” for development.
Detailed progress tracking: See where each task is in its lifecycle with specific statuses that suit your project’s needs.
Improved communication: With clear statuses, teams understand exactly what each task needs next, reducing back-and-forth communication.
Pro Tip: Set up distinct workflows by department to ensure task progress visibility across teams.
4. ClickUp Docs – Collaborate and Organize Information
ClickUp Docs offer a collaborative workspace to store all your team’s documentation and project notes in one place.
Centralized information: Use Docs to store essential information, project notes, briefs, meeting notes, and onboarding materials.
Real-time collaboration: Edit Docs together with team members, adding comments, tagging team members, and linking tasks within the doc.
Custom design options: Customize Docs with headers, banners, and cover images for easy navigation and organized content.
Pro Tip: Link Docs to tasks or projects directly to connect information with action, keeping everything in one place.
5. Time Tracking & Billable Hours – Manage Time and Budgets
ClickUp’s Time Tracking feature helps teams monitor work hours and manage billable time for projects.
Track billable hours: Log hours directly in ClickUp or integrate with tools like Harvest or Toggl for seamless time tracking.
Set time estimates: Add estimated hours to tasks, so teams can stay aware of time constraints and meet deadlines.
Visualize time reports: Review tracked time through reports to see where time is going and identify opportunities to streamline.
Pro Tip: Use time tracking reports to help optimize project budgeting and monitor productivity across projects.
6. Custom Fields – Add Extra Details to Your Tasks
Custom Fields allow you to add additional, tailored information to tasks, helping teams track complex data without needing extra tools.
Add unique data points: Track specific information like budgets, client names, deadlines, or custom priorities.
Filter views with Custom Fields: Organize tasks using custom data to create views that focus on what’s important.
Automate based on Custom Fields: Trigger workflows, reminders, or task assignments based on Custom Field values, adding depth to task organization.
Pro Tip: Use Custom Fields to create tailored task views that highlight key project information.
7. Mind Maps – Plan Out Your Ideas Visually
ClickUp’s Mind Maps allow teams to plan projects and brainstorm visually, laying out ideas in a tree-like structure.
Tasks Mode and Blank Mode: In Tasks Mode, arrange tasks in a mind map format and establish relationships. In Blank Mode, brainstorm ideas and then turn them into actionable items.
Great for brainstorming: Create mind maps for team brainstorming sessions, then turn ideas into project tasks.
Project planning: Visualize project phases, objectives, or goals in Mind Maps, making it easier to plan and communicate the structure.
Pro Tip: Use Mind Maps to map out project phases or campaigns before converting them to organized tasks.
8. Templates – Set Up Projects in a Snap
ClickUp Templates allow teams to quickly replicate successful workflows, saving time and ensuring consistency.
Save any task as a template: Build templates for tasks, lists, projects, or views that can be reused in future projects.
Consistency across teams: Create templates for processes like onboarding, monthly reports, or recurring campaigns to keep everyone on the same page.
Customizable templates: Modify existing templates to fit new project needs, maintaining flexibility while saving setup time.
Pro Tip: Use templates for recurring processes, such as project setup or report generation, to ensure consistency and reduce manual setup time.
9. Goals & OKRs – Keep Everyone Focused on Big Objectives
Goals in ClickUp help teams set, track, and achieve broader objectives that align with business priorities.
Create measurable Goals: Break down Goals into achievable Targets that help teams stay motivated and measure progress.
Link tasks directly to Goals: Track progress by connecting tasks to Targets, helping teams see how daily work aligns with big-picture objectives.
Perfect for OKRs: Goals can align with OKR (Objectives and Key Results) frameworks, keeping team focus on impactful results.
Pro Tip: Regularly review Goals and progress on OKRs to keep everyone aligned and motivated on high-priority objectives.
10. Dashboards – Visualize Project Metrics and Performance
ClickUp’s Dashboards give managers and teams a comprehensive view of project metrics, tracking KPIs, deadlines, and workload.
Add customizable widgets: Use widgets to track metrics like task progress, time tracked, workload distribution, and task priorities.
Monitor team performance: View team productivity at a glance to help identify and address project bottlenecks quickly.
Project health insights: Track overall project health, deadlines, and task load to ensure the team stays on schedule.
Pro Tip: Set up separate Dashboards for different teams or projects to keep key metrics organized and accessible.
Why Using These ClickUp Features Can Boost Your Team’s Productivity
By mastering these hidden ClickUp features, your team can work more efficiently and stay aligned on priorities. These tools allow teams to reduce repetitive tasks, improve communication, and create workflows that fit their specific needs.
Exploring and implementing these features in your ClickUp setup will make it easier to manage projects, achieve team goals, and, ultimately, boost productivity across the board. If you’re ready to take project management to the next level, try these ClickUp tools today!
Ready to elevate your team’s productivity with ClickUp? As the only verified ClickUp reseller in Saudi Arabia, Dtech Systems can help you unlock the full potential of ClickUp. Our team of experts is here to guide you through advanced features, custom setups, and best practices tailored to your business needs. Contact Dtech Systems today and let’s transform the way your team manages projects!
Explore ClickUp API capabilities with this in-depth guide covering authentication, task management, webhooks, integrations, and more. Learn to automate workflows and integrate external tools with ClickUp
Introduction
Are you tired of manual data entry and repetitive tasks eating up your precious time? Say hello to the ClickUp API – your secret weapon for supercharging productivity and streamlining workflows. In this guide, we’ll dive into what the ClickUp API is, how it works, and why it’s a game-changer for businesses of all sizes.
Ready to harness the full potential of the ClickUp API? Let DTech Systems guide you through the process, from initial setup to advanced integrations. Contact us today to learn how we can supercharge your productivity with ClickUp and its powerful API.
What is the ClickUp API?
The ClickUp API is a powerful tool that allows developers to interact with ClickUp’s task management platform programmatically. It’s like having a direct line to ClickUp’s brain, letting you create, update, and manage tasks, projects, and more – all without lifting a finger (well, maybe just a few to write some code).
“The ClickUp API is the key to unlocking true automation in your task management workflow.”
Here’s what you can do with the ClickUp API:
Create and update tasks automatically
Manage custom fields and task dependencies
Track time and generate reports
Set up webhooks for real-time updates
Integrate ClickUp with your favourite tools
Why Use the ClickUp API?
Now, you might be wondering, “Why should I bother with an API?” Great question! Here are some compelling reasons:
Workflow Automation: Say goodbye to manual data entry. The ClickUp API lets you automate repetitive tasks, saving you hours of work each week.
Seamless Integrations: Connect ClickUp with your other essential tools, creating a unified ecosystem for your business operations.
Custom Reporting: Generate tailored reports and dashboards that give you deeper insights into your team’s performance.
Real-time Updates: Stay on top of changes with webhooks, ensuring your team is always in sync.
Scalability: As your business grows, the API allows you to scale your task management processes effortlessly.
Pro Tip: With the ClickUp API, you can create custom integrations that perfectly fit your unique business needs.
Getting Started with the ClickUp API
Ready to dive in? Here’s a quick overview of what you’ll need:
API Authentication: Secure your connection with API tokens.
Explore Endpoints: Familiarize yourself with available API endpoints for tasks, lists, spaces, and more.
Handle Rate Limits: Be mindful of API usage limits to ensure smooth operations.
Postman Collection: Use ClickUp’s Postman collection for easy API testing and exploration.
Authentication and API Access
Choose a personal token for individual use or testing. Use OAuth when other people connect their ClickUp Workspaces to your application.
Personal API Tokens
In ClickUp, open your avatar, then Settings > Apps. The API Token section provides Generate and Regenerate controls. Send your personal token directly in the Authorization header, without the OAuth Bearer prefix:
Authorization: {personal_token}
OAuth for Multi-User Applications
A Workspace owner or admin creates an app under Settings > Apps, configures its redirect URL and obtains its client ID and secret.
Direct users to ClickUp’s authorization URL with the client ID and redirect URI. After authorization, your callback receives a code.
Exchange that code using a server-side POST request to https://api.clickup.com/api/v2/oauth/token, with JSON fields client_id, client_secret and code, as specified by the token endpoint. Use the returned access token in subsequent requests:
Authorization: Bearer {access_token}
ClickUp currently documents non-expiring OAuth access tokens, subject to change. The documented flow does not require a refresh-token exchange. Keep tokens and client secrets out of public code. Check the official authentication documentation before deployment.
Experimenting with the ClickUp API in Your Browser
Before diving deep into implementation, ClickUp offers a convenient way to test and familiarize yourself with the API directly in your web browser. This feature allows you to experiment with various endpoints without writing a single line of code.
How to Access the API Playground
Visit the ClickUp API Reference documentation.
Navigate to any endpoint page you’re interested in exploring.
Look for the “Try It” button in the top right corner of the endpoint description.
Setting Up Your Test Environment
API Key Configuration:
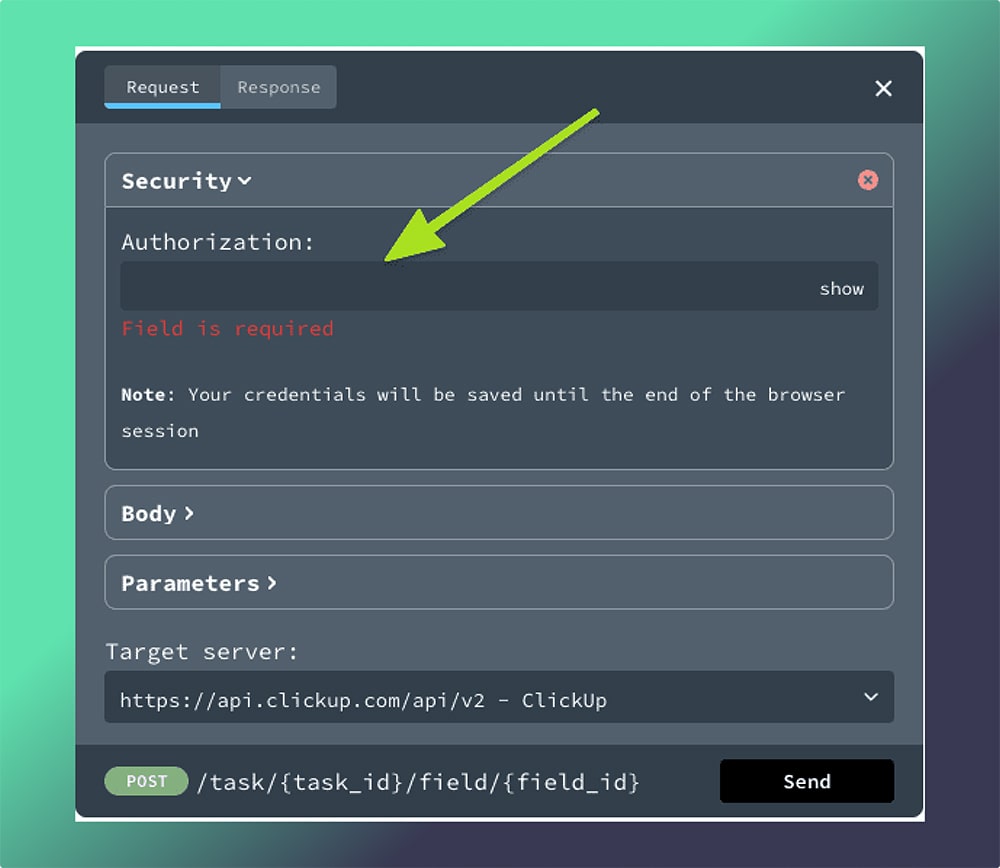
Expand the “Security” section.
Input your personal API key to interact with your actual ClickUp account data.
For testing purposes, you can use any value as an API key when working with the mock server.
Crafting Your Request:
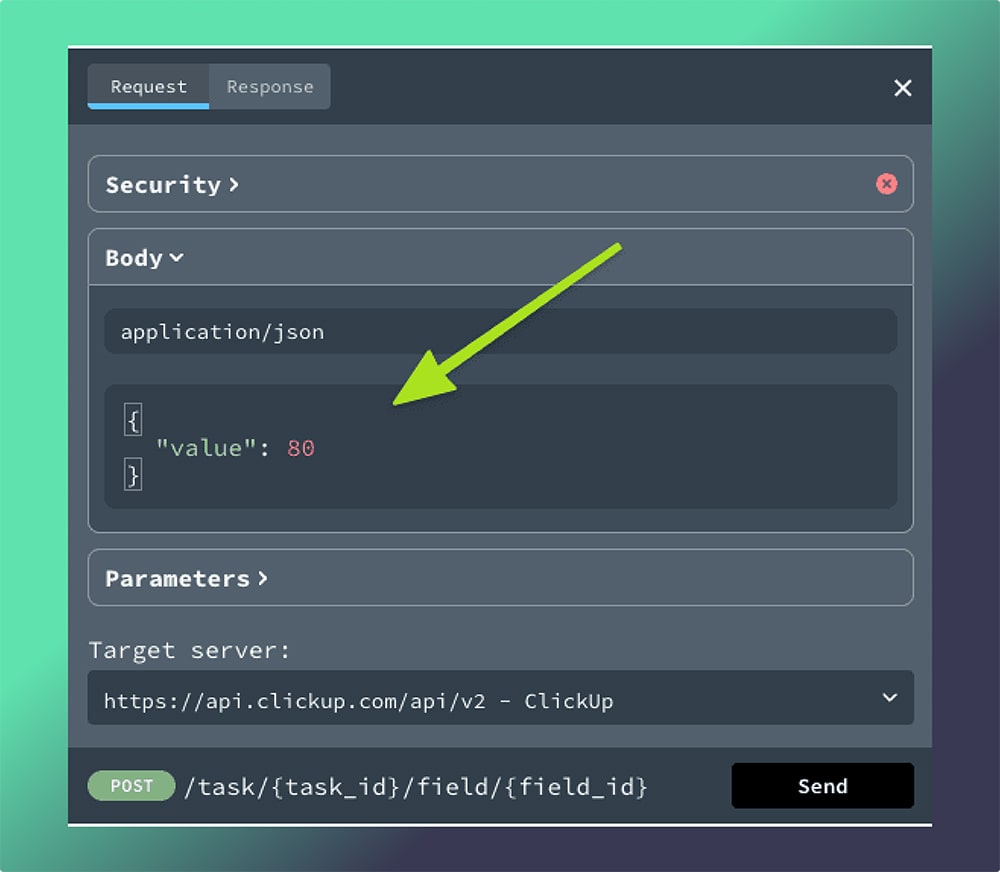
Use the “Body” section to include any necessary data in your request.
Adjust parameters in the “Parameters” section to fine-tune your API call.
3. Choosing Your Server:
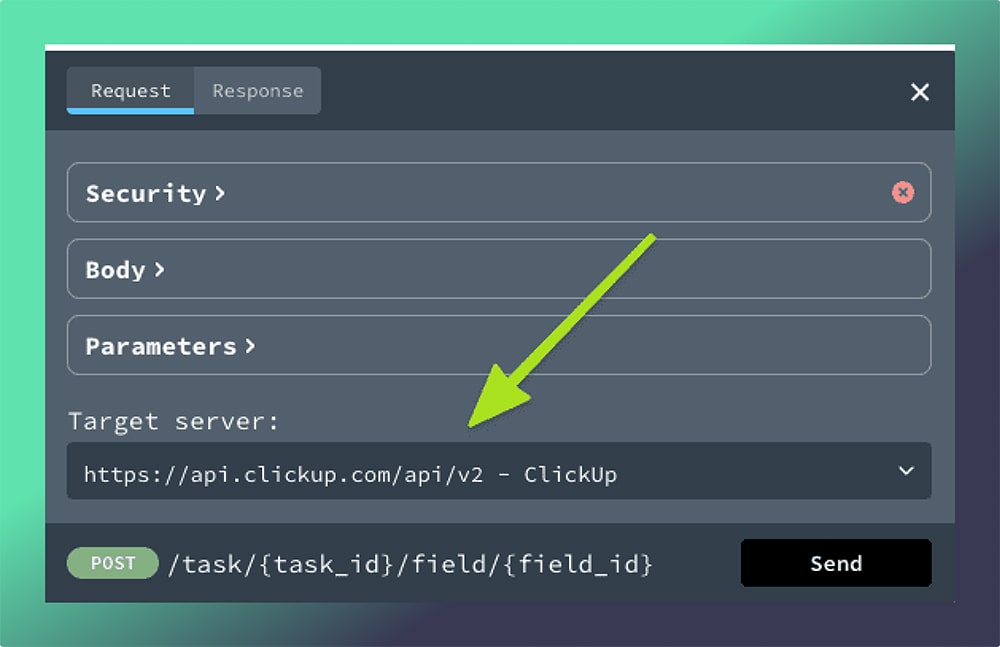
Select between two server options: a) https://api.clickup.com/api/v2 for live ClickUp data b) https://{mock-server-id}.remockly.com for simulated responses
Important Notes:
Requests sent to the live API can read or change real ClickUp data, depending on the endpoint. Use an authorised test environment and check the endpoint before sending a request.
When using the mock server, feel free to input any values in required or optional fields. It’s designed to accept all inputs for testing purposes.
This browser-based testing feature is an excellent way to get hands-on experience with the ClickUp API. It allows you to understand the structure of requests and responses, experiment with different parameters, and see immediate results – all without the need for additional development tools.
Key ClickUp API Features
This section covers the essential features of the ClickUp API, focusing on task management, custom fields, and task dependencies. We’ll explain these features without diving into specific code examples.
Managing Tasks with the API
The ClickUp API provides comprehensive tools for handling tasks programmatically. This includes creating, reading, updating, and deleting tasks (often referred to as CRUD operations).
Creating Tasks: You can add new tasks to any list in your ClickUp workspace. When creating a task, you can specify details like the task name, description, assignees, tags, status, priority, and due date.
Reading Tasks: The API allows you to retrieve task information. You can fetch details for a single task or get a list of tasks within a specific list or folder.
Updating Tasks: Any aspect of a task can be modified through the API. This includes changing the task name, updating its status, reassigning it, or altering its due date.
Deleting Tasks: Tasks can be removed entirely from your ClickUp workspace using the API.
These operations enable you to automate task management processes, sync tasks with external systems, or build custom interfaces for task manipulation.
Managing Custom Fields
Custom fields in ClickUp allow for additional task metadata. The API provides methods to interact with these fields programmatically.
Retrieving Custom Fields: You can get a list of all custom fields associated with a particular list. This includes information about the field type, possible values, and current settings.
Updating Custom Fields: The API allows you to change the values of custom fields for specific tasks. This is useful for updating task metadata based on external events or processes.
Creating and Deleting Custom Fields: While not as common, the API also supports adding new custom fields to lists or removing existing ones.
By leveraging custom fields through the API, you can extend ClickUp’s data model to fit your specific needs and keep it synchronized with other systems.
Utilizing Task Dependencies
The ClickUp API provides functionality to manage relationships between tasks, including dependencies.
Creating Dependencies: You can establish links between tasks, indicating that one task depends on another. This is useful for modelling complex workflows or project structures.
Retrieving Dependencies: The API allows you to fetch information about a task’s dependencies. You can see which tasks it depends on and which tasks are dependent on it.
Deleting Dependencies: If a dependency is no longer relevant, it can be removed through the API.
Types of Dependencies: The API supports different types of dependencies, such as “blocking” (where one task must be completed before another can start) or “waiting on” relationships.
By using these API features for task dependencies, you can create sophisticated project management tools, automate workflow processes, or ensure task sequences are properly maintained across your systems.
These key features of the ClickUp API provide a robust foundation for building integrations, automations, and custom tools that extend and enhance ClickUp’s functionality to meet specific organizational needs.
Advanced API Capabilities
Webhooks for Real-Time Event Notifications
Webhooks in ClickUp allow you to receive real-time notifications when specific events occur in your workspace. This feature enables event-driven automation and keeps your external systems in sync with ClickUp.
Key aspects of ClickUp webhooks:
Setup: You can create webhooks for various events like task creation, updates, or status changes. Each webhook is associated with a specific endpoint URL where ClickUp will send event data.
Event Types: ClickUp supports a wide range of event types, including task-related events, list changes, and more. You can choose which events to subscribe to based on your needs.
Payload: When an event occurs, ClickUp sends a POST request to your specified URL with a JSON payload containing event details.
Security: Webhooks include a secret key for verification, ensuring that the incoming data is genuinely from ClickUp.
Use Cases: Webhooks are ideal for triggering automated actions, updating external databases, or sending notifications to team communication tools.
Time Tracking and Reports via API
The ClickUp API provides robust capabilities for time tracking and generating reports, allowing you to automate and integrate these features into your workflow.
Key features:
Time Entry Management: You can programmatically start, stop, and edit time entries for tasks. This is useful for integrating ClickUp with external time tracking tools or building custom time tracking interfaces.
Retrieving Time Data: The API allows you to fetch time entries for specific tasks, users, or date ranges. This data can be used to generate custom reports or dashboards.
Report Generation: While ClickUp doesn’t provide direct report generation through the API, you can use the time data to create custom reports tailored to your needs.
Bulk Operations: The API supports bulk operations for time entries, allowing for efficient data management and updates.
Automation Possibilities: With these API capabilities, you can automate time tracking processes, create custom billing systems, or integrate time data with project management tools.
Integrations with External Tools
Native Integrations Supported by ClickUp API
ClickUp offers a wide range of native integrations that can be enhanced or customized using the API. Some key integrations include:
Slack: Synchronize ClickUp tasks with Slack channels, send notifications, or create tasks from Slack messages.
Jira: Bi-directional sync between ClickUp and Jira, allowing teams to work in their preferred tool while maintaining data consistency.
Google Drive: Attach Google Drive files to ClickUp tasks, create new Google Docs from ClickUp, or sync task details with Google Sheets.
GitHub: Link ClickUp tasks to GitHub issues or pull requests, automate status updates based on code changes.
Zapier: Create complex automation workflows involving ClickUp and hundreds of other apps.
The ClickUp API allows you to extend these native integrations, adding custom functionality or tailoring them to your specific workflow needs.
Custom Integrations Using ClickUp API
Building custom integrations with the ClickUp API allows you to create tailored solutions for your organization’s unique needs. Here’s a high-level guide on creating custom integrations:
Define Requirements: Clearly outline what you want your integration to accomplish. Identify the data flow between ClickUp and your other systems.
API Familiarization: Thoroughly review the ClickUp API documentation to understand available endpoints and data structures.
Authentication: Implement the appropriate authentication method (OAuth 2.0 or Personal API Tokens) based on your integration’s needs.
Data Synchronization: Develop routines to sync data between ClickUp and your external systems. This might involve periodic API calls or webhook-driven updates.
Error Handling: Implement robust error handling to manage API rate limits, network issues, and data inconsistencies.
User Interface: If needed, create a user interface for your integration, allowing users to configure settings or trigger actions.
Testing: Thoroughly test your integration in a development environment before deploying to production.
Deployment and Maintenance: Deploy your integration and establish a process for ongoing maintenance and updates.
Custom integrations can range from simple scripts that automate specific tasks to complex applications that deeply integrate ClickUp with your organization’s software ecosystem. The flexibility of the ClickUp API allows for a wide range of possibilities, enabling you to optimize your workflows and increase productivity.
Best Practices for Using the ClickUp API
API Rate Limits and Performance Optimization
Understanding and respecting API rate limits is crucial for maintaining stable and efficient integrations with ClickUp. Here are key points to consider:
Rate Limits: ClickUp imposes limits on the number of API requests that can be made within a given time frame. These limits vary based on your account type and the specific endpoint being accessed.
Monitoring Usage: Keep track of your API usage to ensure you’re staying within the allocated limits. ClickUp provides headers in API responses that indicate your current usage and remaining quota.
Batch Operations: Whenever possible, use batch operations to reduce the number of API calls. For example, update multiple tasks in a single request instead of making separate calls for each task.
Caching: Implement caching strategies to store frequently accessed data locally, reducing the need for repeated API calls.
Asynchronous Processing: For non-time-sensitive operations, consider implementing asynchronous processing to spread out API calls over time.
Security Considerations for API Access
Ensuring the security of your ClickUp API integration is paramount. Here are best practices for maintaining security:
Secure Storage of Credentials: Store API tokens and OAuth credentials securely. Never expose these in client-side code or public repositories.
Use OAuth 2.0: For multi-user applications, prefer OAuth 2.0 over personal API tokens. This allows for more granular access control and easier token management.
Implement HTTPS: Always use HTTPS for all API communications to encrypt data in transit.
Principle of Least Privilege: Only request the minimum necessary permissions for your application to function.
Regular Audits: Periodically review and rotate API keys and tokens. Implement a process for revoking access when no longer needed.
Conclusion
The ClickUp API is a powerful tool that unlocks a world of possibilities for businesses and developers alike. By providing programmatic access to ClickUp’s robust task management features, it enables unprecedented levels of customization, automation, and integration.
As businesses continue to evolve in an increasingly digital landscape, tools like the ClickUp API become essential for staying competitive. By embracing its capabilities, organizations can create a more agile, responsive, and effective project management ecosystem, ultimately driving better outcomes and success in their endeavours.
Discover 10 essential ClickUp hacks to boost your productivity, streamline workflows, and master project management. Perfect for teams and freelancers alike—get organized and achieve your goals with these powerful tips!
ClickUp is like the Swiss Army knife of project management—packed with features, customizable tools, and productivity-boosting options. However, with so much to explore, even seasoned users may miss out on some of ClickUp’s hidden gems. Here’s a guide to 10 essential hacks to help you make the most out of ClickUp, improve team efficiency, and take project management to the next level!
1. Minimize Task Switching with the Task Tray
The Task Tray is a lifesaver if you often juggle multiple tasks. Instead of constantly opening and closing tasks, use the Task Tray to minimize them, similar to browser tabs. This lets you quickly return to tasks without losing progress or focus.
Pro Tip: Keep your most important tasks in the Task Tray throughout the day for instant access. It’s perfect for managing follow-ups, urgent tasks, and tasks requiring frequent updates.
2. Create a Favorites Bar for Quick Navigation
If you frequently navigate to specific lists, documents, or folders, add them to your Favorites Bar. This bar serves as a personalized dashboard of your most-used items, helping you skip the extra steps of navigating through menus. You can access it from the left-hand side of ClickUp, keeping essential items one click away.
Example Uses for Favorites Bar:
Pin your team’s weekly progress report folder to the Favorites Bar.
Add commonly referenced docs like client briefs or guidelines.
Include priority tasks or deadlines to keep them top-of-mind.
To add an item to your Favorites, simply right-click and select “Add to Favorites.” This item will appear in a dropdown menu on the left sidebar, with an option to pin for easy one-click access.
3. Use Everything View for a Calendar Overhaul
The Everything View Calendar offers a bird’s-eye view of your projects across all spaces, tasks, subtasks, and lists. Use it to get a holistic perspective of your deadlines, due dates, and priorities. From here, you can drag and drop tasks, adjust dates, and organize your schedule in real-time.
Pro Tip: Use filters in the Everything View to show tasks by priority or project type. Once set up, add this view to your Favorites for quick access to a complete view of your schedule.
4. Streamline Task Management with Custom Task Templates
Creating task templates saves you time on repetitive processes. You can standardize workflows by setting up templates for common tasks like weekly reporting, client onboarding, or content creation. With templates, new projects and processes remain consistent and clear.
Template Ideas:
Weekly progress report templates
Standardized meeting agendas
Client onboarding checklists
To create a template, go to the task settings, save it as a template, and specify fields to include, such as checklists, tags, due dates, and assignees. Reusing templates keeps your project structure consistent and reduces the risk of missing essential steps.
5. Take Advantage of Focus Mode for Deep Work
When working in ClickUp Docs, activate Focus Mode to hide distractions by removing surrounding text or sidebars. This minimalist writing environment is perfect for moments when you need to concentrate on creating documentation, brainstorming, or strategic planning.
Focus Mode offers two options:
Block Focus: Dulls the surrounding text while keeping the area you’re typing in clear.
Page Focus: Hides sidebars, creating a minimalist writing space that reduces distractions.
Pro Tip: Use Focus Mode when preparing detailed project documentation, creating training materials, or brainstorming. Adding Focus Mode to your daily routine helps improve productivity and keeps you in the “flow” state.
6. Utilize the Notepad for Quick Brain Dumps
The Notepad in ClickUp is perfect for capturing ideas, quick notes, or to-do lists without leaving your workspace. Located in the Shortcuts menu, the Notepad allows you to jot down thoughts and keep them accessible no matter which part of ClickUp you’re working in.
Pro Tip: Use your Notepad for quick brainstorms or to note recurring ideas that can later be turned into structured tasks. It’s great for capturing fleeting thoughts, and you can even organize your notes by priority if needed.
7. Use ClickUp’s Goal-Tracking Feature for Long-Term Projects
ClickUp’s Goals feature breaks down large objectives into actionable targets, tracking your progress with visual indicators. Ideal for big projects, the feature lets you monitor task completion percentages and keep everyone on track.
How to Set Goals in ClickUp: Define a main objective, break it into smaller targets, and assign tasks to each goal for seamless tracking. As team members complete tasks, your goal progress updates in real-time.
Pro Tip: Add goals to your dashboard for quick visibility and automate reminders to check on progress. This is especially useful for project managers who need to stay aligned with team objectives and milestones.
8. Speed Up Workflows with ClickUp Automations
Automate repetitive tasks to free up time and minimize errors. ClickUp Automations allow you to set triggers and actions that handle mundane tasks, such as moving tasks, setting due dates, or updating priorities.
Example Automations:
Automatically move completed tasks to “Done.”
Set task due dates based on priority levels.
Notify team members when a task reaches a certain stage.
Setting up automations is easy, and you can customize them for various workflows, from project management to client communications.
9. Customize Your Views for a Tailored Workflow
ClickUp offers various task views, including List, Board, Calendar, and Gantt, each useful for different purposes. Customizing your views lets you visualize tasks and projects according to your workflow needs.
Recommended Views for Specific Workflows:
Board View: Ideal for Kanban-style task management and Agile workflows.
Calendar View: Perfect for tracking deadlines and scheduling.
Gantt View: Great for managing project timelines and dependencies
Switching between views allows for flexibility in managing tasks, and you can set up custom filters, grouping options, and sorting preferences to make each view more useful.
10. Install the ClickUp Chrome Extension for On-the-Go Productivity
The ClickUp Chrome Extension allows you to manage tasks, track time, capture screenshots, and open your Notepad without leaving your browser. It’s ideal for handling ClickUp tasks while working on other sites and makes time tracking simpler for freelancers and remote teams.
Key Features of the ClickUp Chrome Extension:
Time Tracking: Track your time on tasks from any webpage.
Screenshot Capture: Instantly capture and annotate screenshots.
Quick Task Creation: Add tasks to ClickUp directly from Chrome.
For professionals who rely on multiple browser tabs, the ClickUp Chrome Extension offers seamless integration, allowing you to manage ClickUp tasks while staying productive on other sites.
Final Thoughts
These ClickUp hacks are designed to help you optimize productivity, eliminate distractions, and streamline workflows. Whether you’re a team manager, freelancer, or small business owner, implementing these tips can make your project management more efficient. Try incorporating these hacks one by one, and watch as ClickUp becomes your ultimate productivity partner.
Ready to take your project management to the next level with ClickUp? As the only verified ClickUp reseller in Saudi Arabia, Dtech Systems is here to help you customize ClickUp for your team’s unique needs. Get in touch with Dtech today to unlock ClickUp’s full potential and transform your workflows!
Learn how to connect ClickUp with Slack for easy project management. Get step-by-step instructions, tips on setting up notifications, and discover how to make the most of ClickUp Slack integration for better team communication.
For teams that rely on ClickUp for task management and Slack for real-time communication, integrating these two tools can transform the way you work. With ClickUp Slack integration, your team can stay updated, assign tasks, and discuss projects—all within Slack. This guide will show you how to connect ClickUp and Slack, set up notifications, and make the most of this integration for smooth project management.
Why Connect ClickUp with Slack?
Integrating ClickUp and Slack can keep your team on track and make communication around tasks much easier. Here are the top reasons to connect these two tools:
Get Instant Notifications – Get real-time alerts on task changes, comments, and project updates directly in Slack.
Create and Assign Tasks in Slack – Add new tasks to ClickUp without leaving Slack, which is convenient when you’re in the middle of a conversation.
Better Collaboration – See task changes in real time and communicate directly about updates, helping your team stay in sync.
With ClickUp Slack integration, you don’t need to constantly switch between apps. All the updates and task details you need are available right in Slack.
What You’ll Need for the Integration
Before you get started, here’s what you’ll need to integrate ClickUp and Slack:
A ClickUp Plan – The Slack integration is available on every ClickUp plan.
Single Slack Workspace – Each ClickUp Workspace can connect to one Slack workspace. However, a Slack workspace can link to multiple ClickUp Workspaces.
Admin or Member Access – Members, admins, and owners can enable the integration using a personal connection. Only admins and owners can set up a Workspace connection.
No Guest Access – Guests cannot use the integration with Slack.
Step-by-Step Guide to Setting Up ClickUp and Slack
Let’s go over the steps to connect ClickUp and Slack:
Step 1: Enable the Integration with Slack
There are two types of connections for integrating ClickUp with Slack: Personal Connection and Workspace Connection. Here’s how to set up each one:
Using a Personal Connection
Go to App Center in ClickUp.
Search for Slack and select it.
Choose Personal as the connection type.
Click Connect and allow ClickUp access.
Using a Workspace Connection
Open the App Center in ClickUp.
Look for Slack and select it.
Choose Workspace as the connection type.
Click Connect and give ClickUp access.
With this setup, you can sync ClickUp activities to specific Slack channels and customize your notifications.
Step 2: Enable ClickUp Activity Sync with Slack
Once the integration is active, you can set up activity sync to receive ClickUp updates in Slack. Here’s how:
Go to the App Center in ClickUp and select Slack.
Choose specific Spaces, Folders, or Lists from your ClickUp Workspace to sync.
Select Slack channels to receive updates. You can only choose public channels you’re a part of or private channels with ClickUp access.
Tip: To give ClickUp access to a private Slack channel, use the command /invite @ClickUp.
You can create a #clickup channel in Slack to organize all ClickUp notifications in one place. Remember, only the person who set up the Workspace connection can change which channels and locations receive ClickUp updates.
Step 3: Customize ClickUp Notifications in Slack
With ClickUp’s Slack integration, you can choose specific actions that trigger notifications in Slack. This way, you’ll only receive relevant updates.
In the App Center, go to Slack and select Notification Settings.
Choose which actions you’d like to receive notifications for, such as Task Updates, Comments, or New Tasks.
Customize notifications based on task activity, document updates, or task assignments.
By controlling notification settings, you can avoid overwhelming your Slack channels with unnecessary alerts.
Step 4: Search Slack Messages Using Connected Search
ClickUp’s Connected Search feature lets you search through Slack messages directly from ClickUp. This is helpful for quickly finding conversations related to a project or task.
Here’s how to enable Connected Search:
Go to the App Center in ClickUp.
Find Slack and select it.
Choose Personal or Workspace Connected Search.
Toggle on Connected Search and click Reconnect.
Once enabled, you can search through Slack messages from up to one year ago. Note that this indexing process can take up to 24 hours.
Step 5: Preview Tasks, Comments, and Docs in Slack
When you connect ClickUp with Slack, you’ll see previews of ClickUp tasks, comments, and Docs directly in Slack. Here’s how it works:
Post a link to a ClickUp task, comment, or Doc in Slack.
A preview, also known as an “unfurl,” will appear, showing details like status, assignees, and priorities.
For privacy, note that links to private ClickUp tasks or Docs will be visible to everyone in a Slack channel. If previews aren’t showing up, check Slack’s settings to make sure link previews are enabled for ClickUp.
Step 6: Use Slack Actions to Create Tasks or Comments
With the ClickUp Slack integration, you can turn Slack messages into ClickUp tasks or add them as comments to existing tasks. This feature is especially useful for turning ideas discussed in Slack into actionable tasks in ClickUp.
To use Slack actions:
Hover over a Slack message and select
Choose to either create a task from the message or add it as a comment on an existing ClickUp task.
You can also automate Slack actions with ClickUp’s ClickBot for additional functionality.
Step 7: Use Slack Link Previews
Once you paste your first Slack link in a task description or comment, a Slack icon will appear in the right sidebar of your Task view in ClickUp. This icon allows you to see all Slack links associated with a task at any time.
Step 8: Access the Slack App Panel in Task View
Once you paste your first Slack link in a task description or comment, a Slack icon will appear in the right sidebar of your Task view in ClickUp. This icon allows you to see all Slack links associated with a task at any time.
Disconnecting the ClickUp and Slack Integration
If you decide to stop using the ClickUp and Slack integration, you can easily disconnect it:
Go to the App Center in ClickUp.
Search for Slack and select it.
Click the ellipsis (…) and choose Disconnect.
You can reconnect Slack to ClickUp anytime if you change your mind.
How to Use ClickUp in Slack to Boost Team Management
Now that ClickUp and Slack are connected, here’s how you can use the integration to improve teamwork and manage projects more effectively:
1. Easily Create Tasks in Slack
You can create new tasks in ClickUp from Slack without needing to open ClickUp. Use the following command in any Slack channel to start:
/clickup new task
This command lets you add task details, such as the title, description, due date, and assignee, directly from Slack. For example:
/clickup new task Design homepage for the new website - Due in 3 days - Assigned to @John
This feature is helpful when new tasks come up during discussions, allowing you to add them instantly without interrupting the conversation.
2. Stay Updated on Task Changes
The ClickUp Slack integration lets you receive real-time updates on tasks, so you’re always informed without having to check ClickUp. You’ll get notifications when a task changes, such as a new comment, a change in status, or completion. This way, you’re always up to date on what’s happening with your projects.
3. Quickly Add Comments to Tasks
Need to share feedback? You can add comments to ClickUp tasks from Slack by replying to notifications. This feature keeps all updates and feedback in one place and is especially helpful for remote or distributed teams. Just reply directly to the ClickUp notification in Slack to comment on a task without opening ClickUp.
4. Organize Slack Channels for Each Project
Creating dedicated Slack channels for each ClickUp project can make project management much smoother. You can link Slack channels to ClickUp tasks, making it easy for team members to find updates or ask questions specific to each project.
5. Set Reminders for Key Deadlines
Slack reminders can help your team stay on track with important due dates. Set up reminders for milestones or upcoming deadlines to keep everyone aware of project timelines. This feature is helpful for keeping your team organized, especially on projects with strict deadlines.
Tips for Making the Most of ClickUp and Slack Integration
Here are some practical tips to help your team make the most of the ClickUp and Slack integration:
Limit Notifications – Set up only the most important notifications to avoid clutter in your Slack channels. Consider what notifications are most helpful and turn off the rest.
Use Commands for Fast Actions – Try out commands like /clickup new task to create tasks or /clickup list tasks to see your task list.
Organize Conversations Around Projects – Use comments and Slack channels to keep conversations focused on specific projects and tasks. This approach helps keep everyone organized and clear on project goals.
Train Your Team – Make sure everyone on your team knows how to use basic Slack commands to create tasks, comment on tasks, and check updates. A short training session can make a big difference in how your team uses the integration.
Common Questions About ClickUp Slack Integration
Here are answers to some common questions about using ClickUp with Slack:
How often can I search new Slack messages with Connected Search?
New messages are indexed every 10 minutes, so they’ll be searchable in ClickUp shortly after they’re sent.
Will external Slack Connect channels be searchable?
Yes, if you enabled Personal Connected Search. External channels and messages that you have access to will be included.
Who can use Connected Search?
This depends on the type of connection. For Workspace Connected Search, only members of both Slack and ClickUp can search for public channels and messages. Personal Connected Search allows individuals to search all Slack messages they have access to.
What happens if I disconnect Slack from ClickUp?
If you disconnect Slack, your Slack messages will no longer be searchable, and all Slack data will be removed from ClickUp within one day.
Improve Team Productivity with ClickUp and Slack Integration
Connecting ClickUp with Slack is a powerful way to keep your team organized and informed. By receiving task updates, creating tasks from Slack, and managing notifications, your team can stay on track without constantly switching between tools. With ClickUp Slack integration, your team can work together efficiently, keeping projects and communication connected.
Setting up ClickUp and Slack together can make your work much easier, but if you need additional support, Dtech Systems is here to help! As a certified ClickUp expert and the only ClickUp reseller in Saudi Arabia, Dtech Systems offers setup, training, and support for ClickUp integrations and more. Visit Dtech Systems to learn more about how we can help you set up ClickUp and Slack for efficient project management. Contact us today to streamline your team’s work and boost productivity!
In today’s fast-paced business world, picking the right project management tool is crucial. ClickUp and Jira are two popular options, each with its own strengths. This guide will help you understand which one might work best for your team.
At DTech Systems, we specialize in helping organizations in Saudi Arabia get the most out of ClickUp. As a verified ClickUp reseller, we offer setup, consulting, coaching, and training services. Whether you’re a project manager, solopreneur, or company founder, we’re here to support your success with ClickUp.
Now, let’s take a closer look at ClickUp and Jira:
Overview of ClickUp and Jira
ClickUp Overview
ClickUp is a versatile project management tool designed for various types of work. Here’s what it offers:
Customizable workspaces
Task management features
Time tracking
Collaboration tools
ClickUp works well for both small teams and large companies. It’s known for being flexible and easy to adapt to different workflows.
Jira Overview
Jira, created by Atlassian, was originally built for software development teams. Its key features include:
Agile project management tools
Issue tracking
Detailed reporting
Customizable workflows
While Jira is still most popular with software teams, it has expanded to serve other industries too. It’s particularly strong in handling complex projects and workflows. Both tools have their strengths, and the right choice depends on your team’s specific needs. In the following sections, we’ll compare ClickUp and Jira in more detail to help you make an informed decision.
Primary Differences at a Glance
While both tools offer project management solutions, they differ in several key aspects:
User Interface: ClickUp boasts a more modern, intuitive interface, while Jira’s interface can be more complex but highly customizable.
Flexibility: ClickUp offers more versatility across different project types, whereas Jira excels in software development workflows.
Learning Curve: ClickUp is generally easier to set up and use out of the box, while Jira may require more time to master its advanced features.
Integrations: Both offer extensive integrations, but Jira’s longstanding presence in the market gives it an edge in terms of available third-party apps.
Pricing: ClickUp often comes out as more cost-effective, especially for smaller teams, while Jira’s pricing can be more complex based on user count and features.
Features Comparison
When it comes to project management tools, features can make or break your team’s productivity. Let’s dive into how ClickUp and Jira stack up against each other in key areas.
Task Management
Both ClickUp and Jira offer robust task management capabilities, but they approach it differently. ClickUp:
Offers multiple task views: List, Board, Calendar, Gantt, and more
Supports nested subtasks for complex work breakdown
Allows task dependencies and relationships
Provides custom statuses and fields for each task
Jira:
Focuses on issue tracking with a robust ticketing system
Offers powerful linking between issues
Provides customizable workflows for different task types
Includes estimation and time tracking features
Winner: ClickUp. Its versatility in task views and nested subtask feature make it more adaptable for various project types.
Agile Project Management
For Agile teams, both tools bring strong offerings to the table. ClickUp:
Supports both Scrum and Kanban methodologies
Offers customizable Sprint planning and tracking
Includes velocity charts and burndown reports
Allows for hybrid and custom Agile approaches
Jira:
Provides comprehensive Scrum and Kanban boards
Offers advanced Sprint planning and backlog management
Includes built-in Agile reporting (burndown charts, velocity, etc.)
Supports SAFe (Scaled Agile Framework) for enterprise-level Agile
Winner: Jira, by a narrow margin. While ClickUp is highly capable, Jira’s deep roots in Agile software development give it a slight edge for teams fully committed to Agile methodologies.
Reporting and Analytics
When it comes to keeping stakeholders informed, both tools offer strong reporting features. ClickUp:
Offers a wide range of pre-built reports (workload, time tracking, etc.)
Provides customizable dashboards with various widgets
Includes team analytics and productivity insights
Allows for easy sharing of reports with stakeholders
Offers customizable dashboards and JQL (Jira Query Language) for advanced reporting
Includes cumulative flow diagrams and other Agile metrics
Supports third-party apps for extended reporting capabilities
Winner: ClickUp. Its user-friendly approach to creating and customizing reports, combined with a broader range of pre-built options, makes it more accessible for teams of all types.
Collaboration Tools
In today’s remote-first world, collaboration features are more important than ever. ClickUp:
Includes built-in chat and comment features
Offers collaborative document creation with ClickUp Docs
Provides screen recording and annotation tools
Supports file sharing and integrations with cloud storage services
Jira:
Offers robust commenting and @mentions
Provides integration with Confluence for document collaboration
Supports file attachments to issues
Includes a built-in roadmap feature for high-level planning
Winner: ClickUp. Its all-in-one approach with built-in chat and document collaboration gives it an advantage for teams looking for a unified platform.
Customization Options
Flexibility can be crucial for adapting a tool to your specific workflows. ClickUp:
Allows creation of custom fields, statuses, and tags
Offers powerful, user-friendly automation features
Provides customizable views and dashboards
Supports the creation of custom templates for recurring workflows
Jira:
Offers extensive workflow customization
Provides powerful JQL for custom filtering and reporting
Supports custom fields and issue types
Offers a marketplace with numerous plugins for extended functionality
Winner: Tie. Both tools offer extensive customization. ClickUp’s customization is more user-friendly, while Jira’s is more powerful for complex, specific needs.
Overall, while Jira excels in Agile-specific features, ClickUp’s versatility, user-friendliness, and all-in-one approach make it a strong contender for a wider range of teams and projects. The best choice depends on your team’s specific needs and technical expertise.
Pricing and Plans
Understanding the cost structure of project management tools is crucial for making an informed decision. Let’s break down the pricing for ClickUp and Jira:
ClickUp Pricing:
Free Forever: $0 for unlimited members
• 100MB storage • Unlimited tasks and basic features
Unlimited: $7 per member/month (billed annually)
• Unlimited storage • Unlimited integrations • Advanced features like Gantt charts and custom fields
Business: $12 per member/month (billed annually)
• All Unlimited features • Advanced automation and workload management
Business Plus: $19 per member/month (billed annually)
• All Business features • Team sharing, custom exporting, and advanced permissions
Enterprise: Custom pricing
• All Business Plus features • Enhanced security and support
Jira Pricing:
Free: $0 for up to 10 users
• Basic features and Scrum/Kanban boards
Standard: $8.15 per user/month (unlimited users)
• Advanced permissions and anonymous access
Premium: $16 per user/month
• Unlimited storage and advanced roadmaps
Enterprise: Custom pricing
• Enhanced security and support features
Cost Comparison:
For small teams (1-10 users): ClickUp’s free plan offers more features than Jira’s, making it a better value for small teams or startups.
For medium-sized teams (11-100 users): ClickUp’s Unlimited plan at $7 per user/month is more cost-effective than Jira’s Standard plan at $8.15 per user/month.
For large enterprises (100+ users): Both platforms offer custom Enterprise pricing, but ClickUp’s Business plan at $12 per user/month might be more attractive than Jira’s Premium plan at $16 per user/month for teams that don’t need Jira’s specific enterprise features.
Value for Money: ClickUp generally offers better value for money, especially for small to medium sized businesses. Its free and lower-tier plans provide more features compared to Jira’s equivalents. However, for large software development teams deeply invested in the Atlassian ecosystem, Jira’s specific features might justify the higher cost.
Integrations and Compatibility
In today’s interconnected work environment, the ability to integrate with other tools is crucial. Let’s examine how ClickUp and Jira fare in this aspect:
ClickUp Integrations:
ClickUp offers over 1,000+ integrations, including:
Productivity tools: Slack, Google Workspace, Microsoft Office 365
Development tools: GitHub, GitLab, Bitbucket
Time tracking: Toggl, Harvest
Customer support: Zendesk, Intercom
Marketing: Mailchimp, HubSpot
ClickUp also provides a Chrome extension and mobile apps for iOS and Android, ensuring accessibility across platforms.
Jira Integrations:
Jira, being part of the Atlassian ecosystem, offers robust integrations:
Native integrations with Atlassian products like Confluence and Bitbucket
Over 3,000 apps available in the Atlassian Marketplace
Popular integrations include Slack, GitHub, Jenkins, and Salesforce
Strong API support for custom integrations
Jira also offers mobile apps and browser extensions for seamless workflow.
Integration Flexibility for Agile Teams:
When it comes to integrations, both ClickUp and Jira bring their A-game, but they shine in different areas:
ClickUp:
ClickUp takes the cake for user-friendliness and versatility. With over 1,000 native integrations, it’s like a playground for Agile teams who love to mix and match their tools. Need to connect your favourite time tracker or that nifty design tool? Chances are, ClickUp’s got you covered with just a few clicks. This plug-and-play approach is a godsend for teams who want to hit the ground running without getting bogged down in technical setups.
Jira:
Jira, on the other hand, is like the elder statesman of the project management world. Its integration game is strong, especially if you’re already swimming in the Atlassian pool. With a marketplace boasting over 3,000 apps, Jira’s integration possibilities are vast. For teams that need to create bespoke workflows or have very specific integration needs, Jira’s robust API is like a blank canvas for your wildest integration dreams.
The Verdict
For most Agile teams, especially those who value simplicity and quick setup, ClickUp is the way to go. Its wide array of ready-to-use integrations means you can create your ideal workflow without breaking a sweat. However, if your team is deeply entrenched in the Atlassian ecosystem or you need highly specialized integrations (we’re looking at you, enterprise software teams), Jira might be your better bet. In the end, both platforms offer solid integration capabilities. ClickUp wins on ease of use and out-of-the-box functionality, while Jira takes the crown for customization and depth of integration possibilities. Your choice depends on whether you prefer a smooth, quick setup or the potential for deep, custom integrations.
Ease of Use and User Experience
User Interface
ClickUp’s interface is modern and visually appealing. It offers a customizable dashboard with various views (List, Board, Calendar, Gantt, etc.), allowing users to switch between different project perspectives easily. The UI is intuitive, with a clean layout that doesn’t overwhelm users with too much information at once. Jira’s interface, while functional, can be more complex, especially for new users. It’s designed withsoftware development teams in mind, which means it can be feature-rich but potentially overwhelming for non-technical users. However, recent updates have improved its userfriendliness.
Learning Curve
ClickUp generally has a gentler learning curve. Its interface is more intuitive, and many features are self-explanatory. New users can often start creating tasks and projects within minutes of signing up. Jira typically has a steeper learning curve, especially for teams not familiar with Agile methodologies. Its wealth of features and customization options can take time to fully understand and utilize effectively.
Customer Support and Resources
Both platforms offer extensive support and resources: ClickUp provides:
24/7 customer support
Comprehensive knowledge base and video tutorials
Active user community forums
Regular webinars and training sessions
Jira offers:
Extensive documentation and Atlassian University courses
Large community forums
Premium support options for higher-tier plans
Certified consultants and partners for implementation
While both platforms provide robust support, ClickUp’s resources are generally more accessible for non-technical users
Performance and Reliability
Server Uptime and Performance
Both ClickUp and Jira boast high uptime rates, typically above 99.9%. However, as with any cloudbased service, occasional outages can occur. ClickUp has shown consistent performance, with quick load times even for large projects. They regularly update their status page with real-time performance metrics. Jira, being a more established platform, has a proven track record of reliability. Its performance can vary depending on the instance (cloud vs. self-hosted) and the level of customization.
Security Features and Data Protection
ClickUp offers:
SOC 2 compliance
GDPR compliance
Two-factor authentication
Encryption at rest and in transit
Jira provides:
SOC 2, SOC 3, and ISO 27001 compliance
GDPR compliance
Advanced permission settings
Enterprise-grade security features for higher-tier plans
Both platforms take security seriously, but Jira’s longer market presence has allowed it to develop more advanced security features, especially for enterprise clients.
Scalability
ClickUp is designed to scale from individual users to large enterprises. Its flexible structure allows teams to start small and expand as needed without major restructuring. Jira has proven scalability for large organizations, especially in the tech sector. It can handle thousands of users and complex project structures, though this might require more setup and management.
Conclusion and Recommendation
Choosing between ClickUp and Jira ultimately depends on your team’s specific needs, size, and technical expertise.
ClickUp is an excellent choice for:
Small to medium-sized businesses
Teams that need flexibility across various project types
Organizations looking for an all-in-one solution
Teams that value ease of use and quick onboarding
Jira is better suited for:
Software development teams
Large enterprises with complex workflows
Organizations heavily invested in the Atlassian ecosystem
Teams that require advanced Agile project management features
Both platforms offer free trials, and we highly recommend taking advantage of these to test which tool aligns best with your team’s workflow and needs. Remember, the best project management tool is the one that your team will actually use consistently. For those interested in exploring ClickUp further, DTech Systems offers comprehensive setup, consulting, and training services to help you maximize the platform’s potential for your organization. Don’t hesitate to reach out to us for personalized guidance in implementing ClickUp for your team.
Navigating the Competitive Landscape of the Tech Industry
We’ve all heard the saying, “IT is the future.” However, the truth is that the future has already arrived. While this adage held more weight 20 years ago, today, we are already immersed in the future of technology. That said, there’s still a long way to go, and we witness advancements every day right before our eyes.
Let’s take a closer look at the software industry in particular. In 2021, the global software market was valued at approximately $456 billion, a significant increase from around $152 billion in 2010. Looking ahead, the global software market revenue is projected to reach approximately $698.80 billion in 2024, with an expected annual growth rate (CAGR 2024-2028) of 5.27%. By 2028, the market volume is forecast to soar to $858.10 billion.
The software industry is experiencing rapid growth, leading to increased market saturation. This makes the market incredibly competitive, providing investors and entrepreneurs with numerous options when launching a product. The challenge lies in deciding whom to choose as a partner in this dynamic and crowded landscape.
The Critical Importance of Validating Ideas Before Full-Scale Development
One of the most significant challenges that entrepreneurs often overlook is the validation of their ideas. While every idea may seem unique and promising to its creator, its potential for success is not always guaranteed. Engaging a third party that specializes in the industry can provide invaluable insights to determine the viability of an idea.
At Dtech Systems, idea validation is a cornerstone of our development cycle and a critical service offering. Our product team and stakeholders collaborate closely with clients from the outset. During our initial requirement-gathering meetings, we immerse ourselves in understanding the client’s vision and their aspirations for the product.
We encounter a spectrum of ideas—some that are inherently brilliant with substantial potential, and others that require refinement. To ensure that an idea is robust and market-ready, our team undertakes the following steps:
1.Market Research
Competitor Analysis
Surveys and Focus Groups
Secondary Research
2.Prototyping
While not all projects demand prototyping at the idea validation stage, it becomes essential for more complex undertakings.
Reflecting on our experiences, we have learned the paramount importance of idea testing. A few years back, we allowed our clients to conduct their own research and come to us, often bypassing thorough idea validation. The lessons learned from this approach were invaluable. Ultimately, the success of any product is intrinsically linked to the success of Dtech Systems.
Take, for instance, our work with ROWW. Initially, we proceeded directly with the client’s vision. However, once the MVP was developed, we realized that the market needs were vastly different. While the product could have aligned well with the Western market, it failed to resonate with the Saudi market. The product was based on automations and extensive prerequisites to be filled out which although lengthy safeguarded the interests of both parties involved. The Saudi market however was interested in using a web portal rather than a mobile app and wanted the booking process to be extremely simple without providing pre-requisites. This experience underscored the necessity of a robust idea validation process, which you can read more about in our case study on how we tackled this challenge.
Validating ideas before full-scale development is not just a step in the process; it is a fundamental practice that dramatically increases the likelihood of a product’s success, ensuring that it meets market demands and user needs effectively.
Similarly, we have worked on products like Grapevine, where our product team played an instrumental role in fine-tuning the initial idea. In this case, the MVP (Minimum Viable Product) began with an extensive scope that had to be reassessed. The initial concept included a multitude of features, but we quickly realized that a more streamlined approach was necessary. By cutting down the MVP features, we ensured a quicker launch to market, which was crucial given the novelty of the concept and the need for rapid market penetration before barriers to entry could rise.
This approach was influenced by our earlier experience with ROWW. With ROWW, we initially launched an MVP that had extensive features and functionality. However, these did not align well with the market needs right from the start. This misalignment highlighted the importance of refining and validating ideas to ensure they meet specific market demands.
We took these lessons to heart with Grapevine, focusing on identifying and prioritizing the most critical features that would provide immediate value to users. By doing so, we avoided the pitfalls of overly extensive MVPs and ensured that the product could adapt more flexibly to market feedback.
Transitioning from Idea testing to MVP Development
The term MVP, or Minimum Viable Product, is often tossed around in the software industry so casually that its true meaning can become muddled. Frequently, the initial launch of a product is labeled as the MVP, but in many cases, this version resembles a nearly complete product. This misinterpretation can lead to blurred lines regarding what an MVP should truly be.
An MVP is not just a semi-finished product; it stands for Minimum Viable Product, emphasizing that the product should contain only the essential features necessary to provide value to the intended market. This approach ensures the acceptability of the product and allows for iterative improvements and enhancements based on initial user feedback.
Creating a Minimum Viable Product (MVP) from a more extensive product requires strategic thinking and prioritization. By focusing on the essential features that deliver the most value, you can ensure a quicker market entry with a functional and impactful product. Below are some popular methodologies used to narrow down features for an MVP:
1.MoSCoW Method
The MoSCoW method is an effective technique to prioritize features by categorizing them into four distinct groups:
Must Have: These features are non-negotiable and essential for the MVP. Without them, the product won’t function as intended.
Should Have: While not crucial, these features add significant value. Judging their inclusion requires a balance between their value addition and resource availability.
Could Have: These are nice-to-have features that can be included if time and resources permit. However, they are not crucial for the initial MVP.
Won’t Have (this time): Features that are out of scope for the MVP but could be considered for future releases.
2.Competitor Analysis
Conducting a thorough competitor analysis can provide valuable insights into must-have and differentiating features:
Common Features: Features offered by all competitors are generally expected by the market and should be part of your MVP to meet basic user expectations.
Unique Selling Proposition (USP): To stand out in the crowded market, your MVP should include differentiating features or USPs that provide a competitive edge and attract early adopters.
3.Feature Scoring and Prioritization
Using structured frameworks to score and prioritize features ensures the most critical functionalities are included:
Impact vs. Effort Matrix: Rank all proposed features based on their impact and the effort required to implement them. For the MVP, prioritize high-impact and low-effort features to maximize value with minimal resources.
Voting System: Engage stakeholders in the decision-making process by using a voting system to assess the importance of each feature. This collaborative approach helps ensure alignment and consensus on what the MVP should include.
Key Benefits of Developing an MVP
1. Lower Development Costs
By focusing solely on the critical features that offer value, an MVP reduces development costs significantly. This streamlined development process ensures that resources are spent wisely and avoids the pitfalls of investing in unnecessary features.
2. Faster Time to Market
An MVP allows for a quicker market entry, essential in today’s fast-paced, competitive environment. By launching early, businesses can rapidly introduce their product, capturing market interest and gaining a foothold before competitors.
3. Lower Risk
Developing and launching an MVP mitigates the risks associated with new product development. By testing the core functionalities in the market early, businesses can validate their assumptions and make informed decisions, reducing the risk of failure.
4. Market Validation
An MVP serves as a tool for market validation, providing real-world insights into how the product is received by the target audience. Early user feedback helps determine if there is a market demand, guiding further development and refinements.
5. Opportunity to Attract Investment
Investors are more likely to back a product that has a proven concept. An MVP demonstrates the product’s feasibility and potential, making it easier to attract funding for future development phases.
Once we’ve thoroughly vetted the concept and are confident that the idea is both viable and promising, we can proceed to the next critical phase in our development process. At this juncture, we shift our focus towards creating a Minimal Viable Product (MVP). This MVP serves as the very foundation of our project—a streamlined version of the product that includes only the most essential features necessary for it to function effectively. It’s crafted with the intention of deploying it to a select user base whose feedback will be invaluable. The insights gained from these early adopters will inform us on what adjustments and enhancements need to be made to refine the product further, setting the stage for subsequent iterations that build upon the initial framework provided by the MVP.
Dtech’s Development Cycle
The software development cycle is fairly standard across the industry, with most companies making slight adjustments to fit their specific market needs. At Dtech, we’ve spent years customizing our process to meet our clients’ needs, ensuring that we deliver top-tier results, cost-effectiveness, and minimal revisions. Our process is finely tuned, leveraging platforms like ClickUp for maximum efficiency.
Here’s our game plan: a streamlined, five-step process that covers your project from initial concept to successful launch, with clear milestones and deliverables at every stage.
1. Concept to Launch
Our refined methodology effortlessly guides your project from its initial concept to a triumphant launch, ensuring clear milestones and precise deliverables at every phase.
2.Discovery & Planning
Vision Clarification: Partner with us to define your vision, identify your target demographic, and specify essential features.
Detailed Planning: We craft a thorough Scope of Work document that meticulously details every aspect of the project.
Structured Sprint Models: We create organized sprint models with clearly defined deliverables and timelines to maintain steady progress.
3.Idea Validation
Swift Prototyping: Our team develops Minimum Viable Products (MVPs) rapidly to test foundational ideas.
Core Concept Testing: Using MVPs, we verify the central concept and collect actionable user feedback.
Comprehensive Market Study: Conducting extensive market research and competitor analysis ensures your product aligns with market needs.
4.Design & Development
Exceptional UI/UX: Our adept designers produce user interfaces that are both visually captivating and intuitive to use.
Complete Development: Our full-stack development team creates secure, scalable, and feature-rich applications.
Rigorous Quality Assurance: Comprehensive testing in a staging environment guarantees that the product meets the highest quality standards.
5.Launch & Beyond
Effortless Product Release: We manage a seamless launch to ensure a smooth user experience.
Holistic Testing: Extensive software testing and quality assurance measures are implemented.
Ongoing Partnership: Continuous collaboration ensures ongoing support and maintenance to keep your product in optimal condition.
While terminologies and steps may vary, these phases encompass the core of the software development cycle. Dtech categorizes these steps into three distinct phases:
Phase 1: Product Conceptualization
This phase involves formulating the idea, defining its scope, and planning the release. It includes both discovery and planning as well as idea validation. During this phase, the MVP and its crucial features are determined.
Phase 2: UI/UX Design
Focuses on designing the product. Depending on the project, this may begin with wireframing, direct prototyping, or purchasing a ready-made theme. Along with the UI and design, user journeys and flowcharts are mapped out to ensure an optimal user experience.
Phase 3: Development and Launch
The final step involves executing the plan set out in phases 1 and 2. This includes launching the MVP, gathering market feedback, and implementing product enhancements and advanced features.
Custom Packages for Clients
Dtech’s three-phase approach allows us to create custom packages tailored to our clients’ needs and budgets. This flexibility enables clients to opt for certain phases only based on their requirements.
Example 1: Some clients may wish to mature their idea, opting solely for phase 1 (Product Conceptualization).
Example 2: Clients shifting from other agencies may start directly with phase 2 (UI/UX Design) or phase 3 (Development and Launch).
This flexibility allows clients to work on their projects according to their own pace and budget. Additionally, even for those opting for the complete cycle, commitment and payment can be made on a phase-by-phase basis, reducing hesitation and risk.
Book a Consultation
Interested in learning more? Just have an idea and want to discuss its potential. Book from one of our available consultation services today.